3.2. Working in GH
Workflow in Grasshopper
Interface
Grasshopper’s visual programming gives the ability to combine problem solving with novel rule systems with the use of an easy to use graphical interface.
In Grasshopper you are able to create programs (definitions) by dragging components onto the canvas.
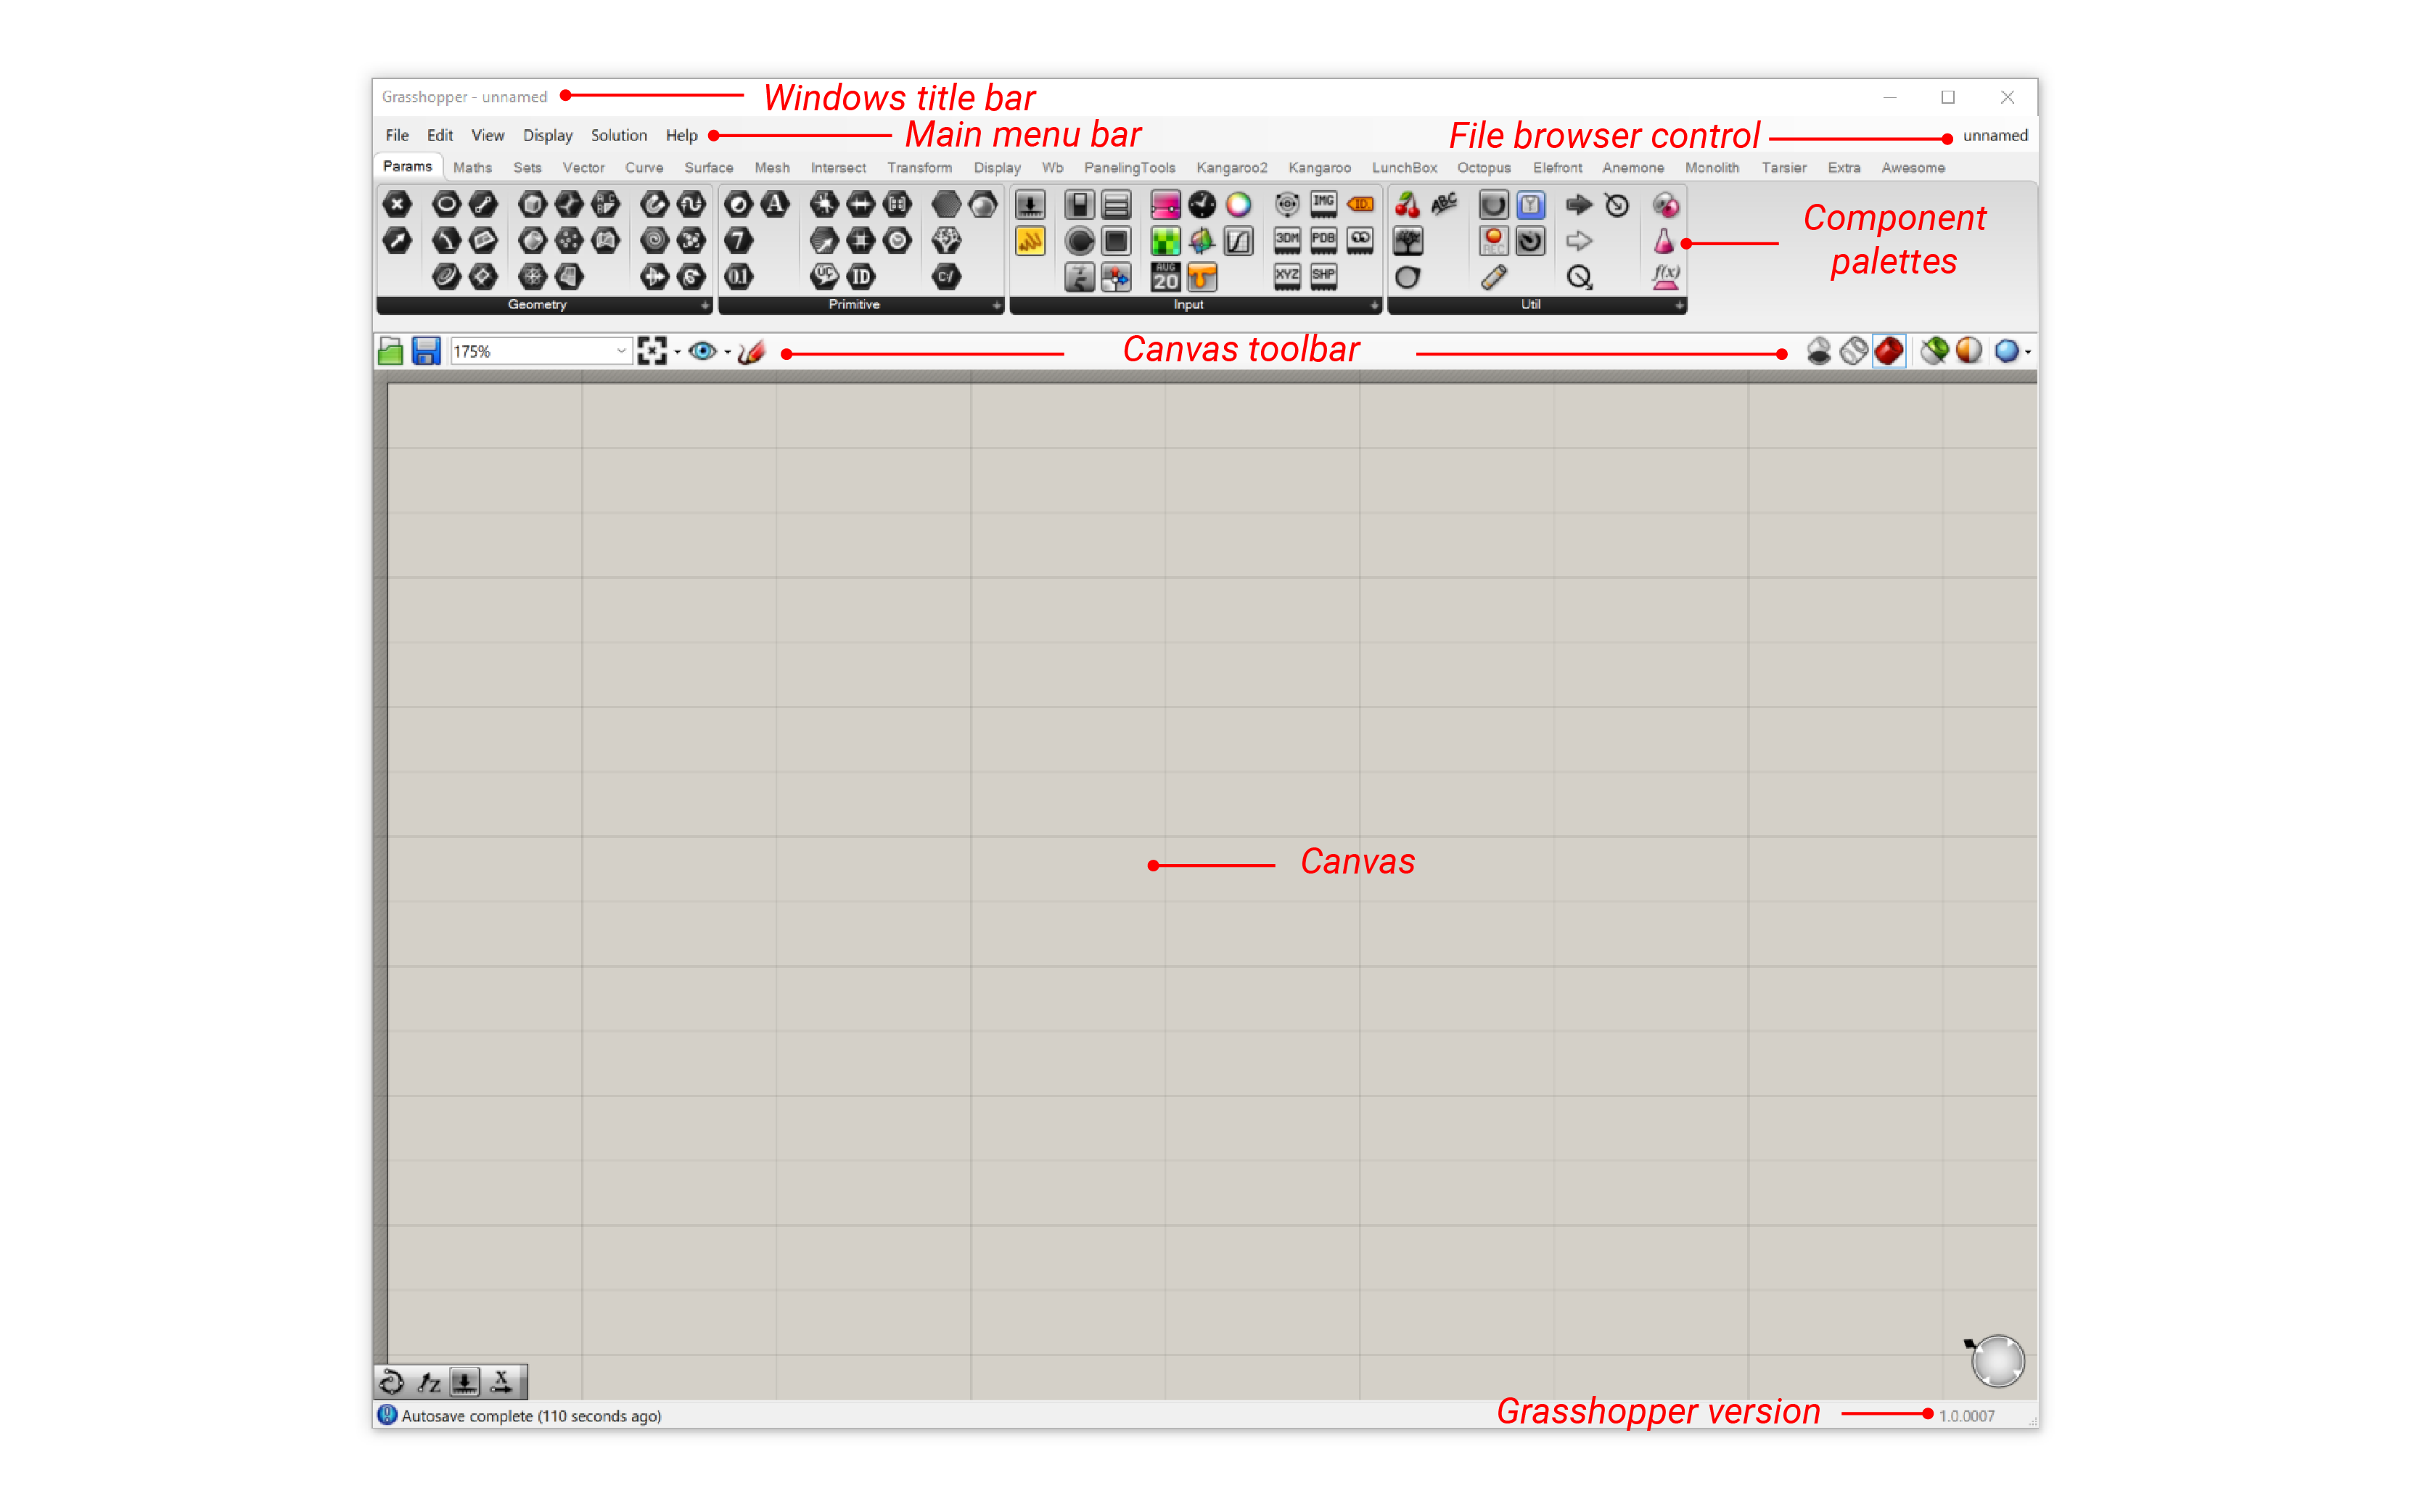
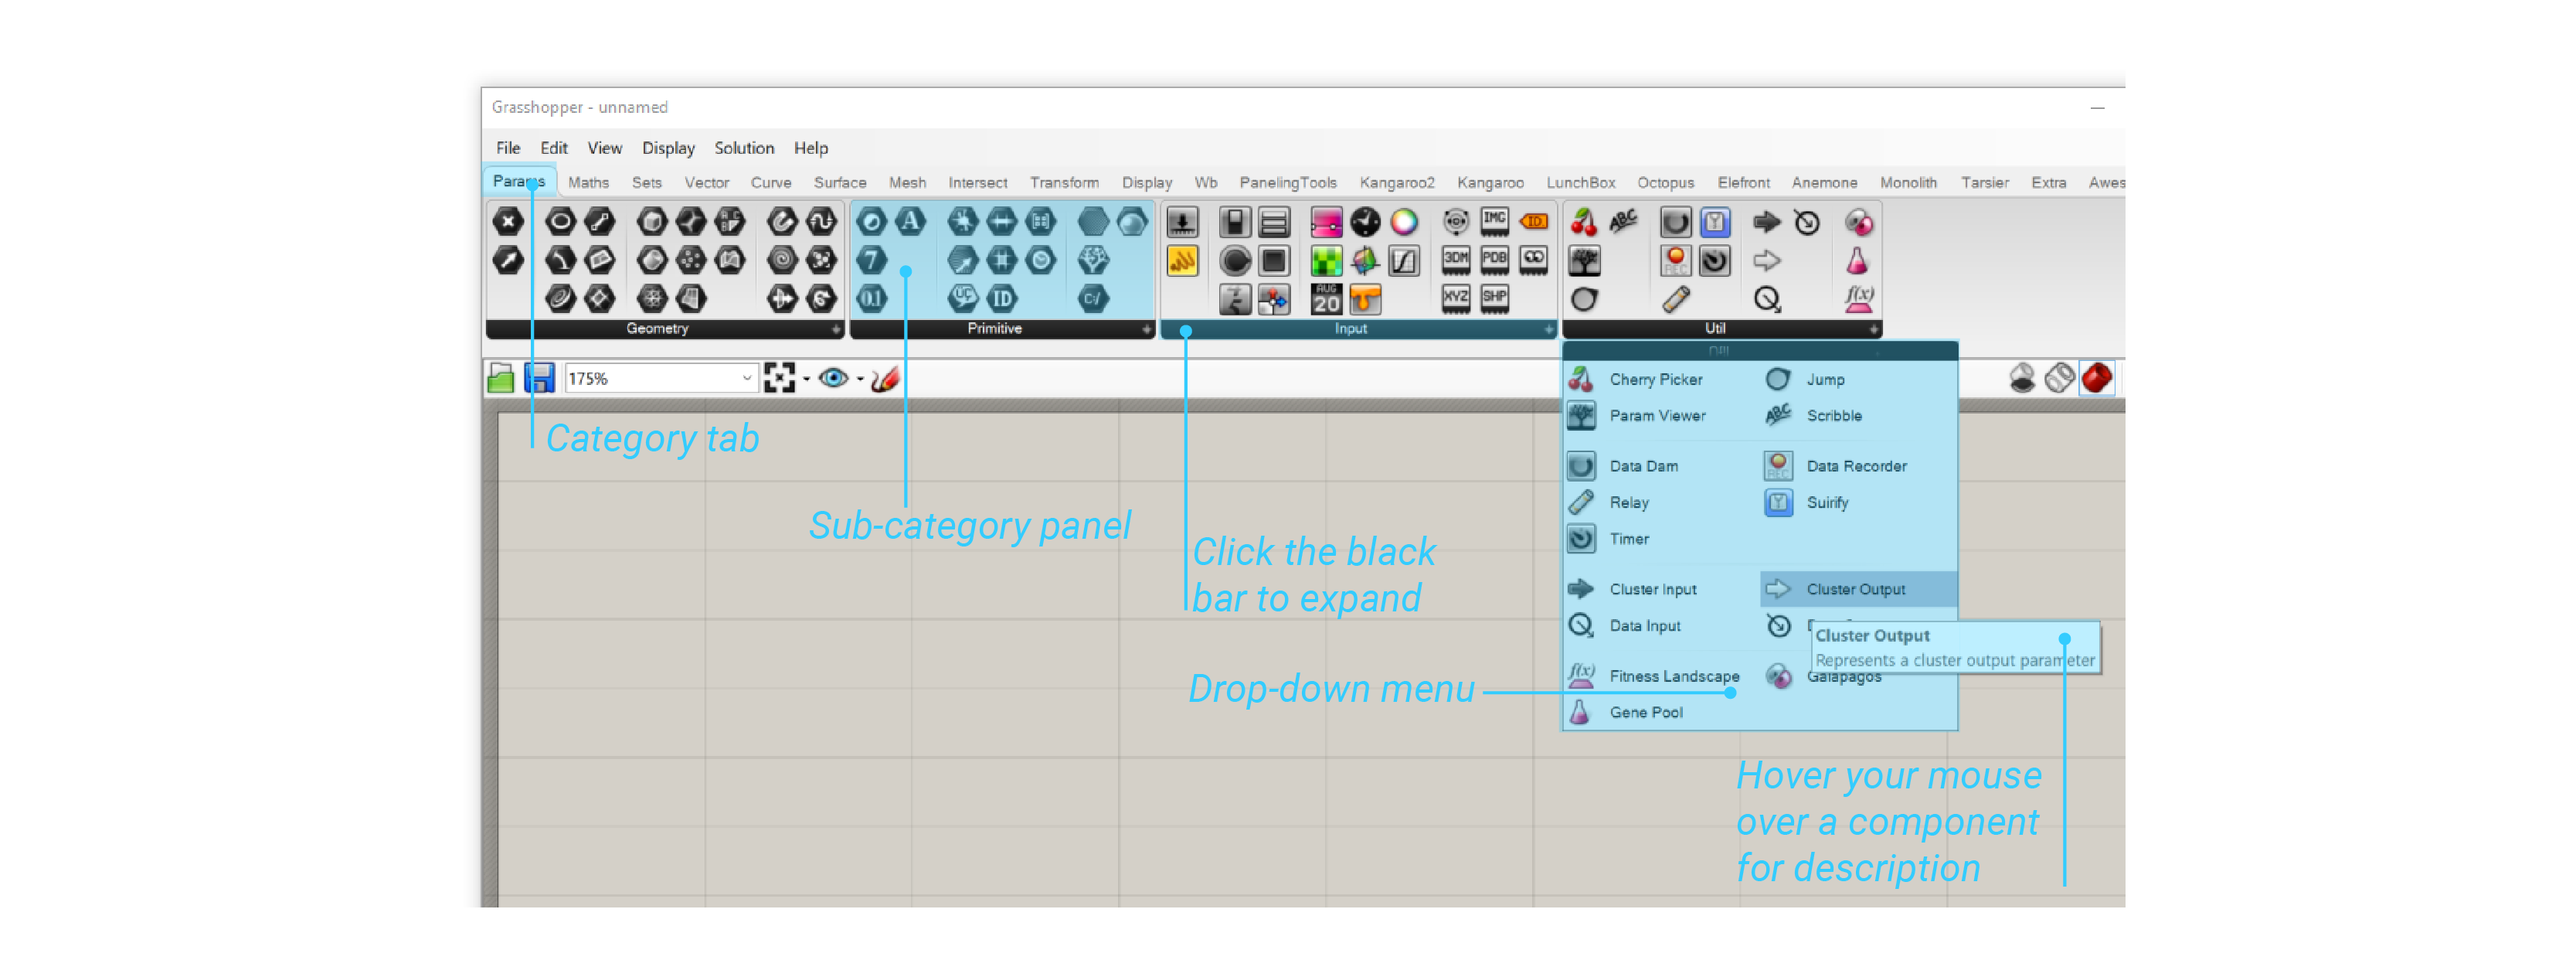
Component Palettes
This area organizes components into categories and sub-categories.
Categories are displayed as tabs, and sub-categories are displayed as drop-down panels.
To add a component to the canvas, you can either click on the objects in the drop-down menu or you can drag the component onto the canvas.
To see all the components in a given sub-category, click on the black bar at the bottom of each panel.
Canvas
The canvas is the primary workspace for creating your definitions.
Here is where you interact with the elements of your program. You can start working in the canvas by placing components and connecting wires.
Toolbar
Provides quick access to frequently used Grasshopper features. You can find this tools in the menu, being able to hide it as well.

Rhino connection
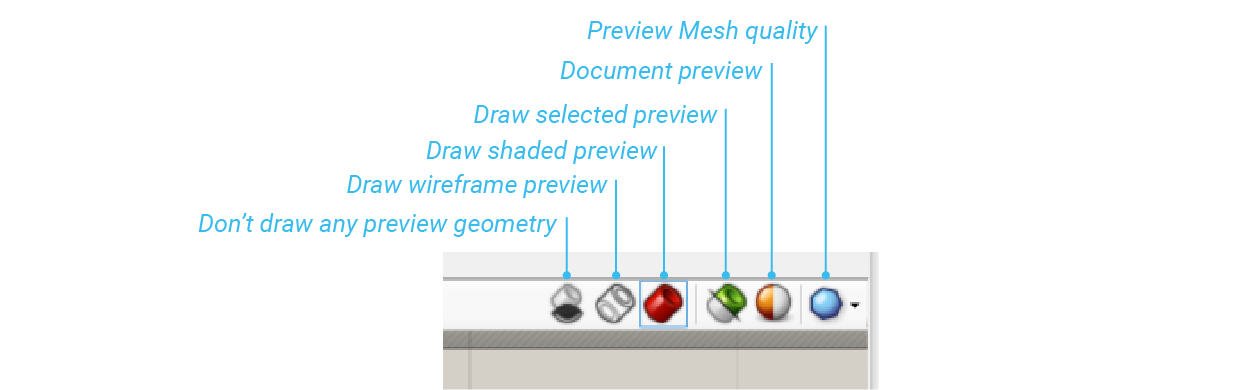
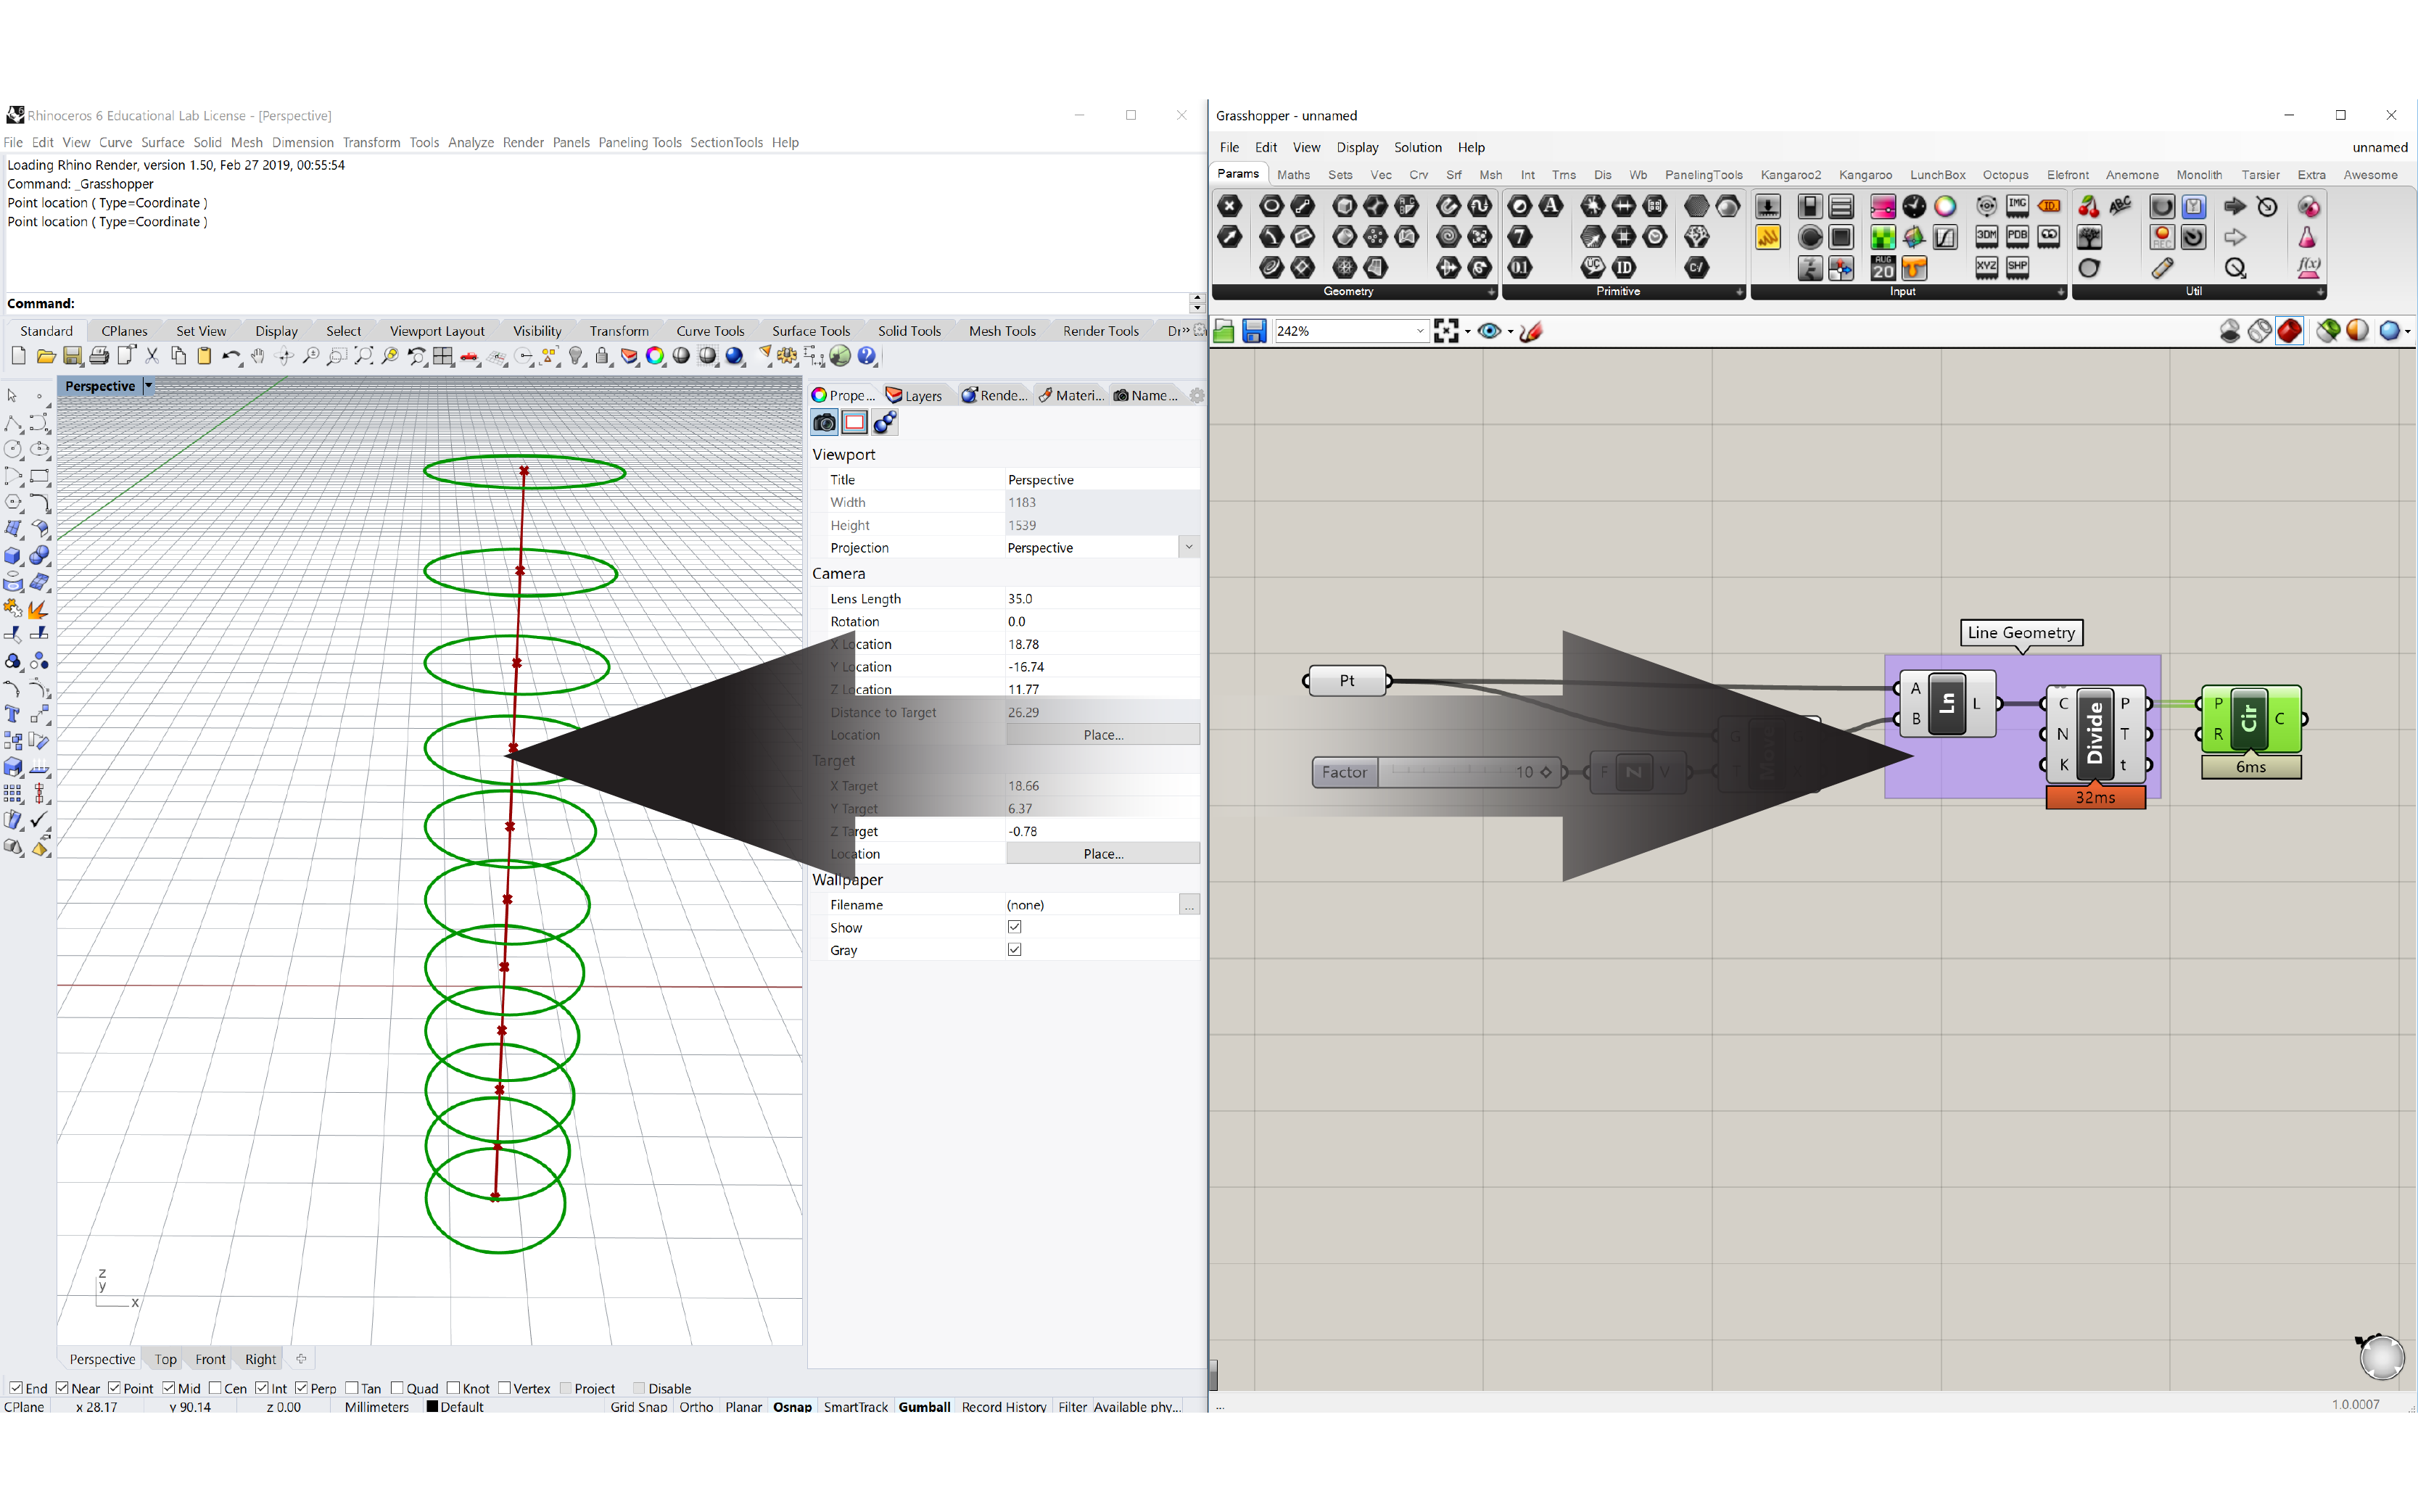
All the geometry that is generated in Grasshopper will be visible in the Rhino viewport.
This preview is just an approximation of the actual geometry, and for that reason you will not be able to select the geometry in the Rhino viewport (important to first bake it into the scene).
Something that you will be always doing is to turn the geometry preview ON / OFF. The geometry in the viewport has different colors providing visual feedback.
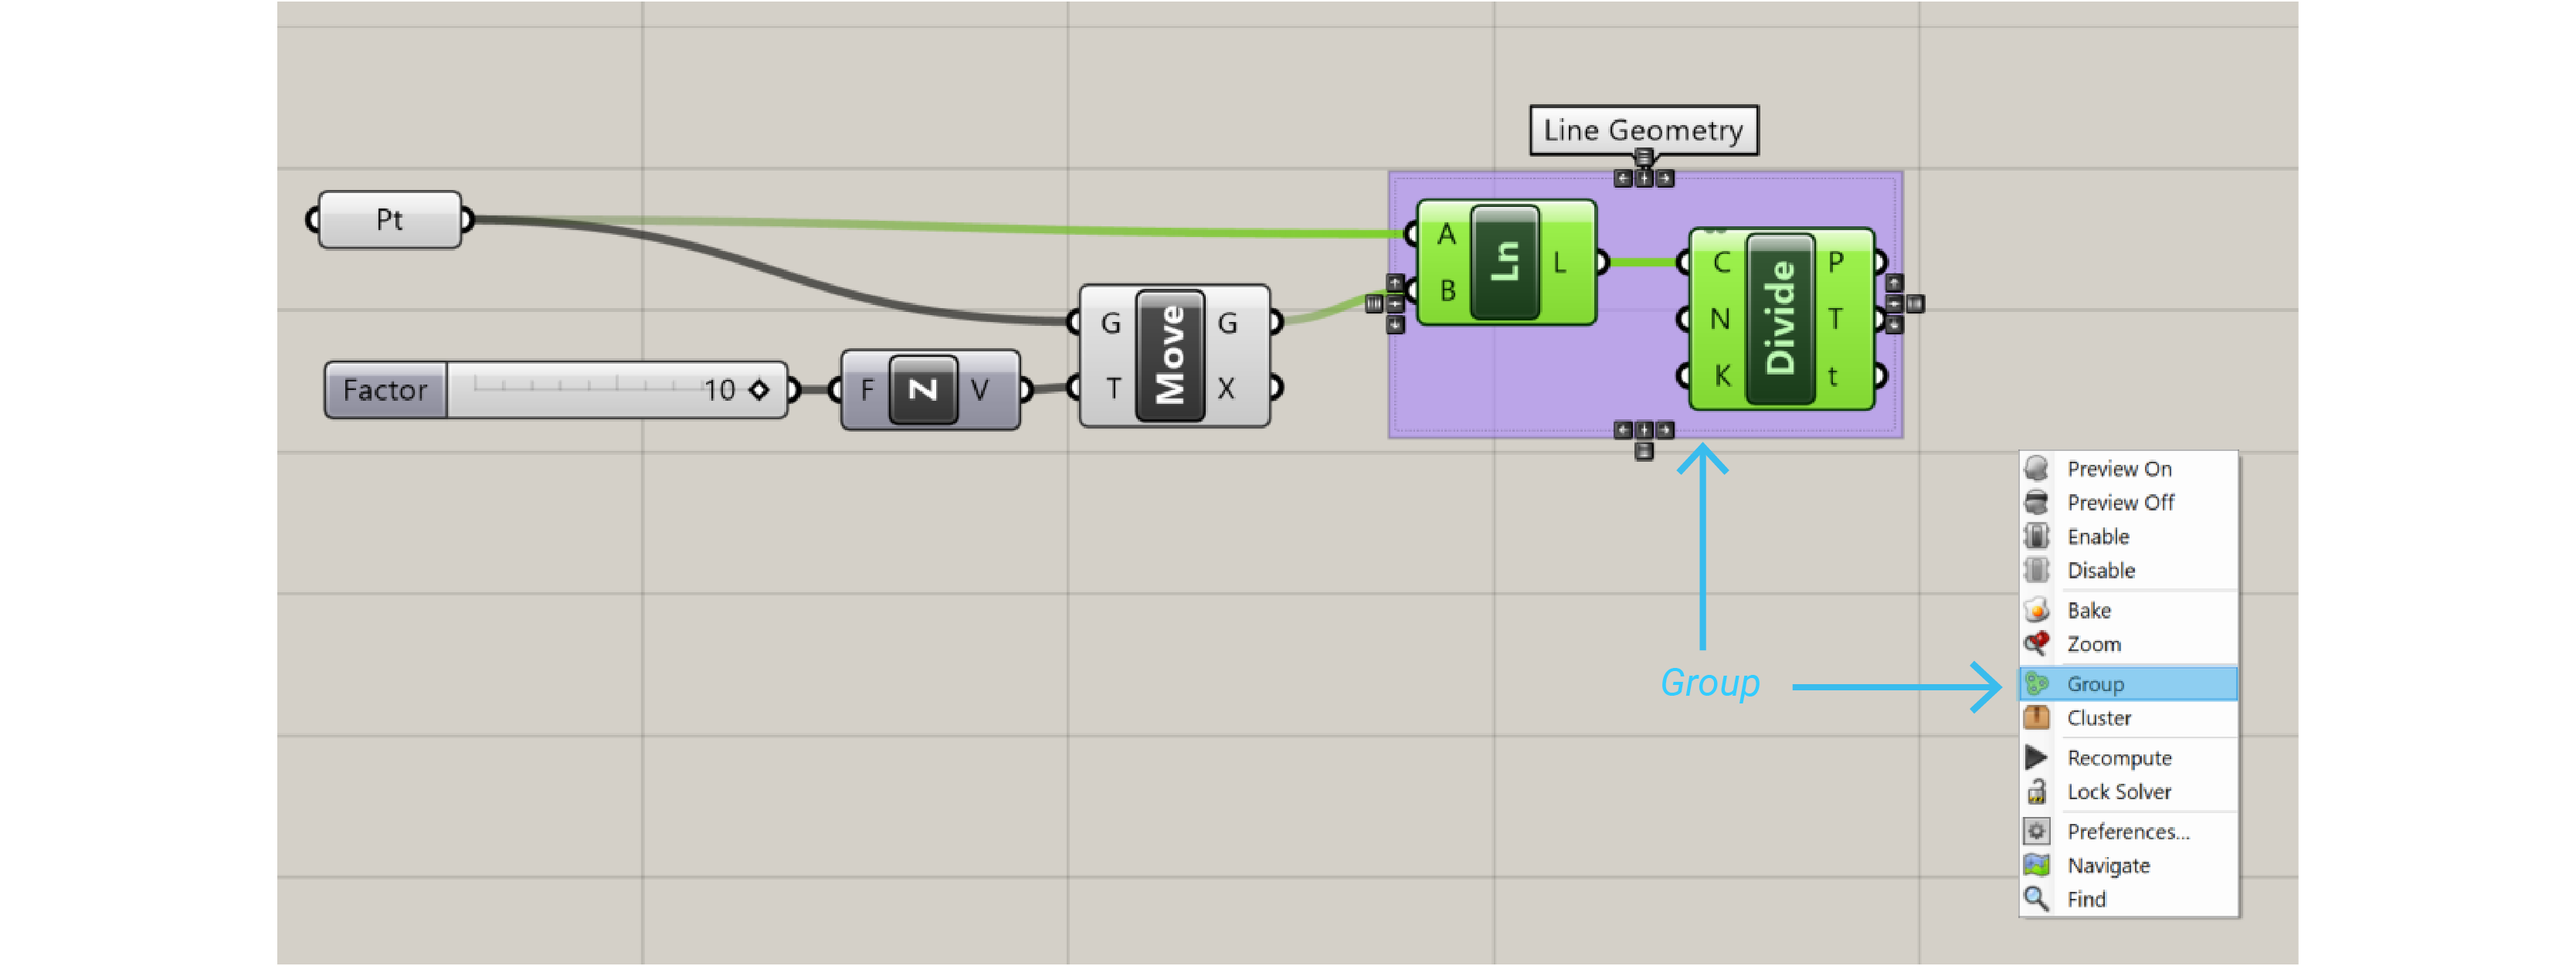
Grouping
Grouping components on the canvas is very useful for readability and organization.
You can create a group by typing Ctrl+G with the desired components selected. A different method can be found under Edit > Group Selection.
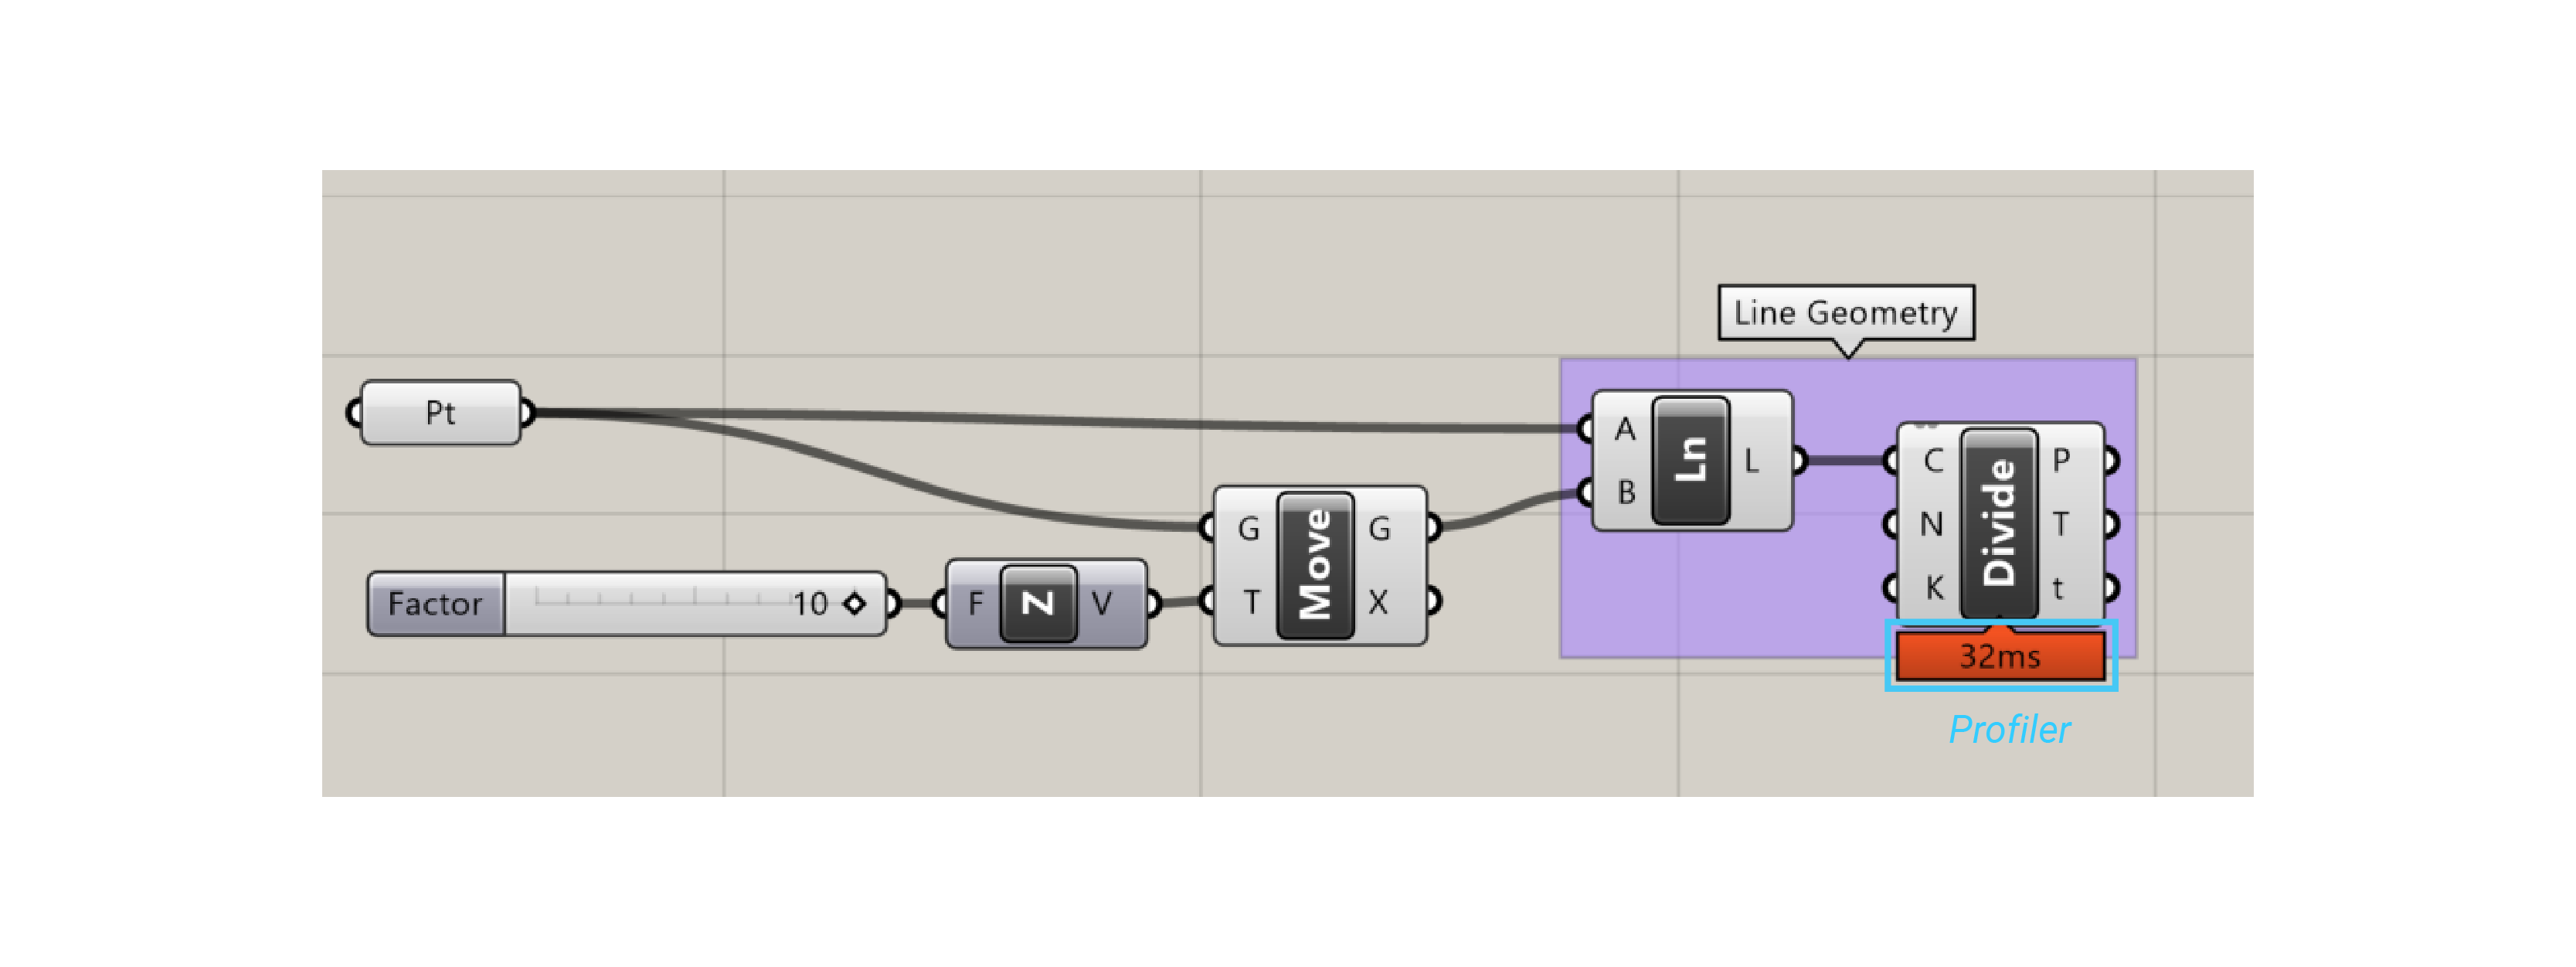
Profiler Widget
The profiler displays the performance of your parameters and components.
You can find it under Display > Canvas Widgets > Profiler.
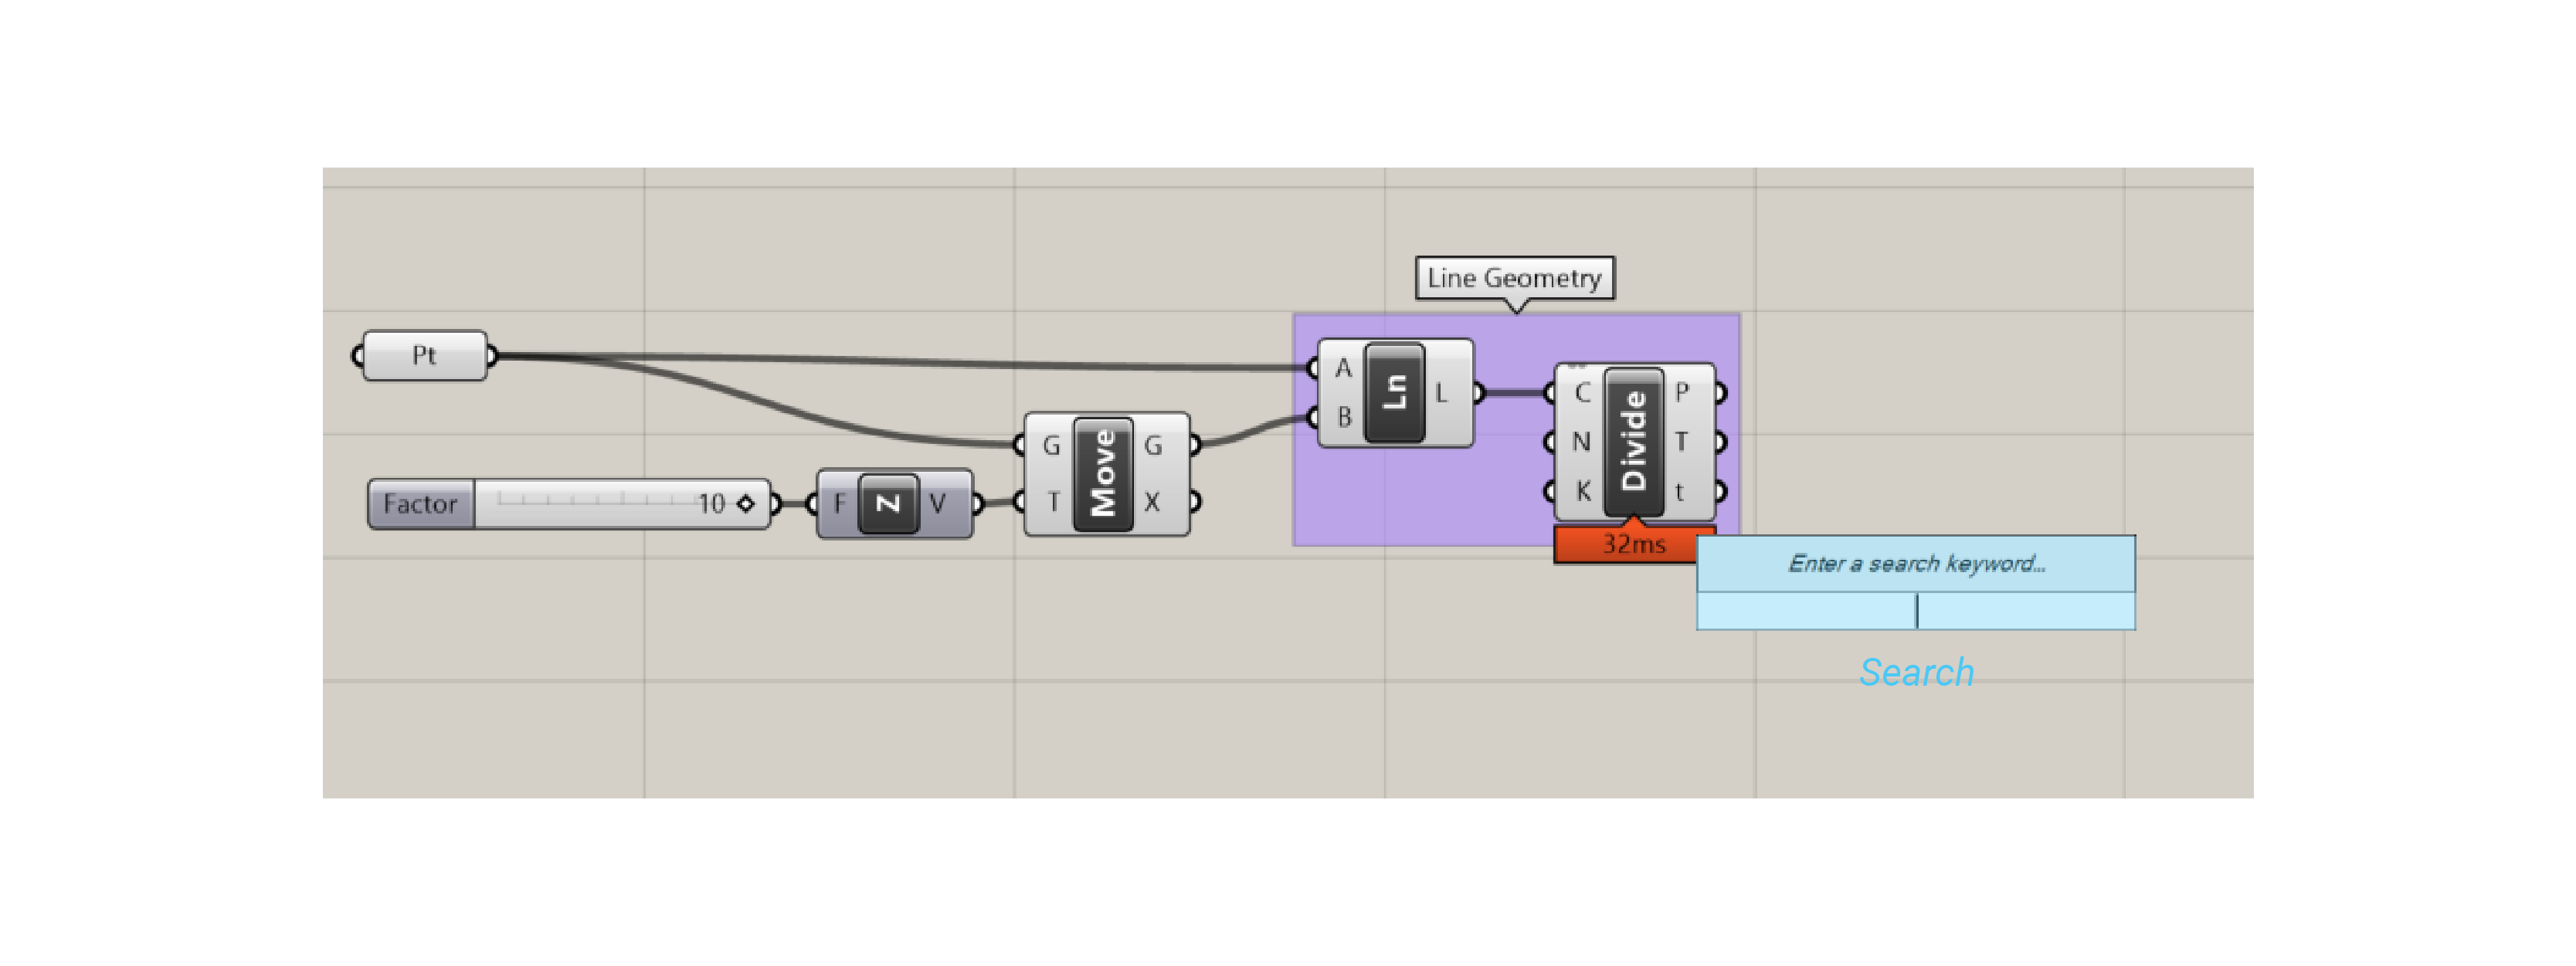
Search feature
You can find this component by double-clicking on any empty space on the canvas.
This will open a pop-up search box.
Here you can type in the name of the component you are looking for and you will see a list that match your request.
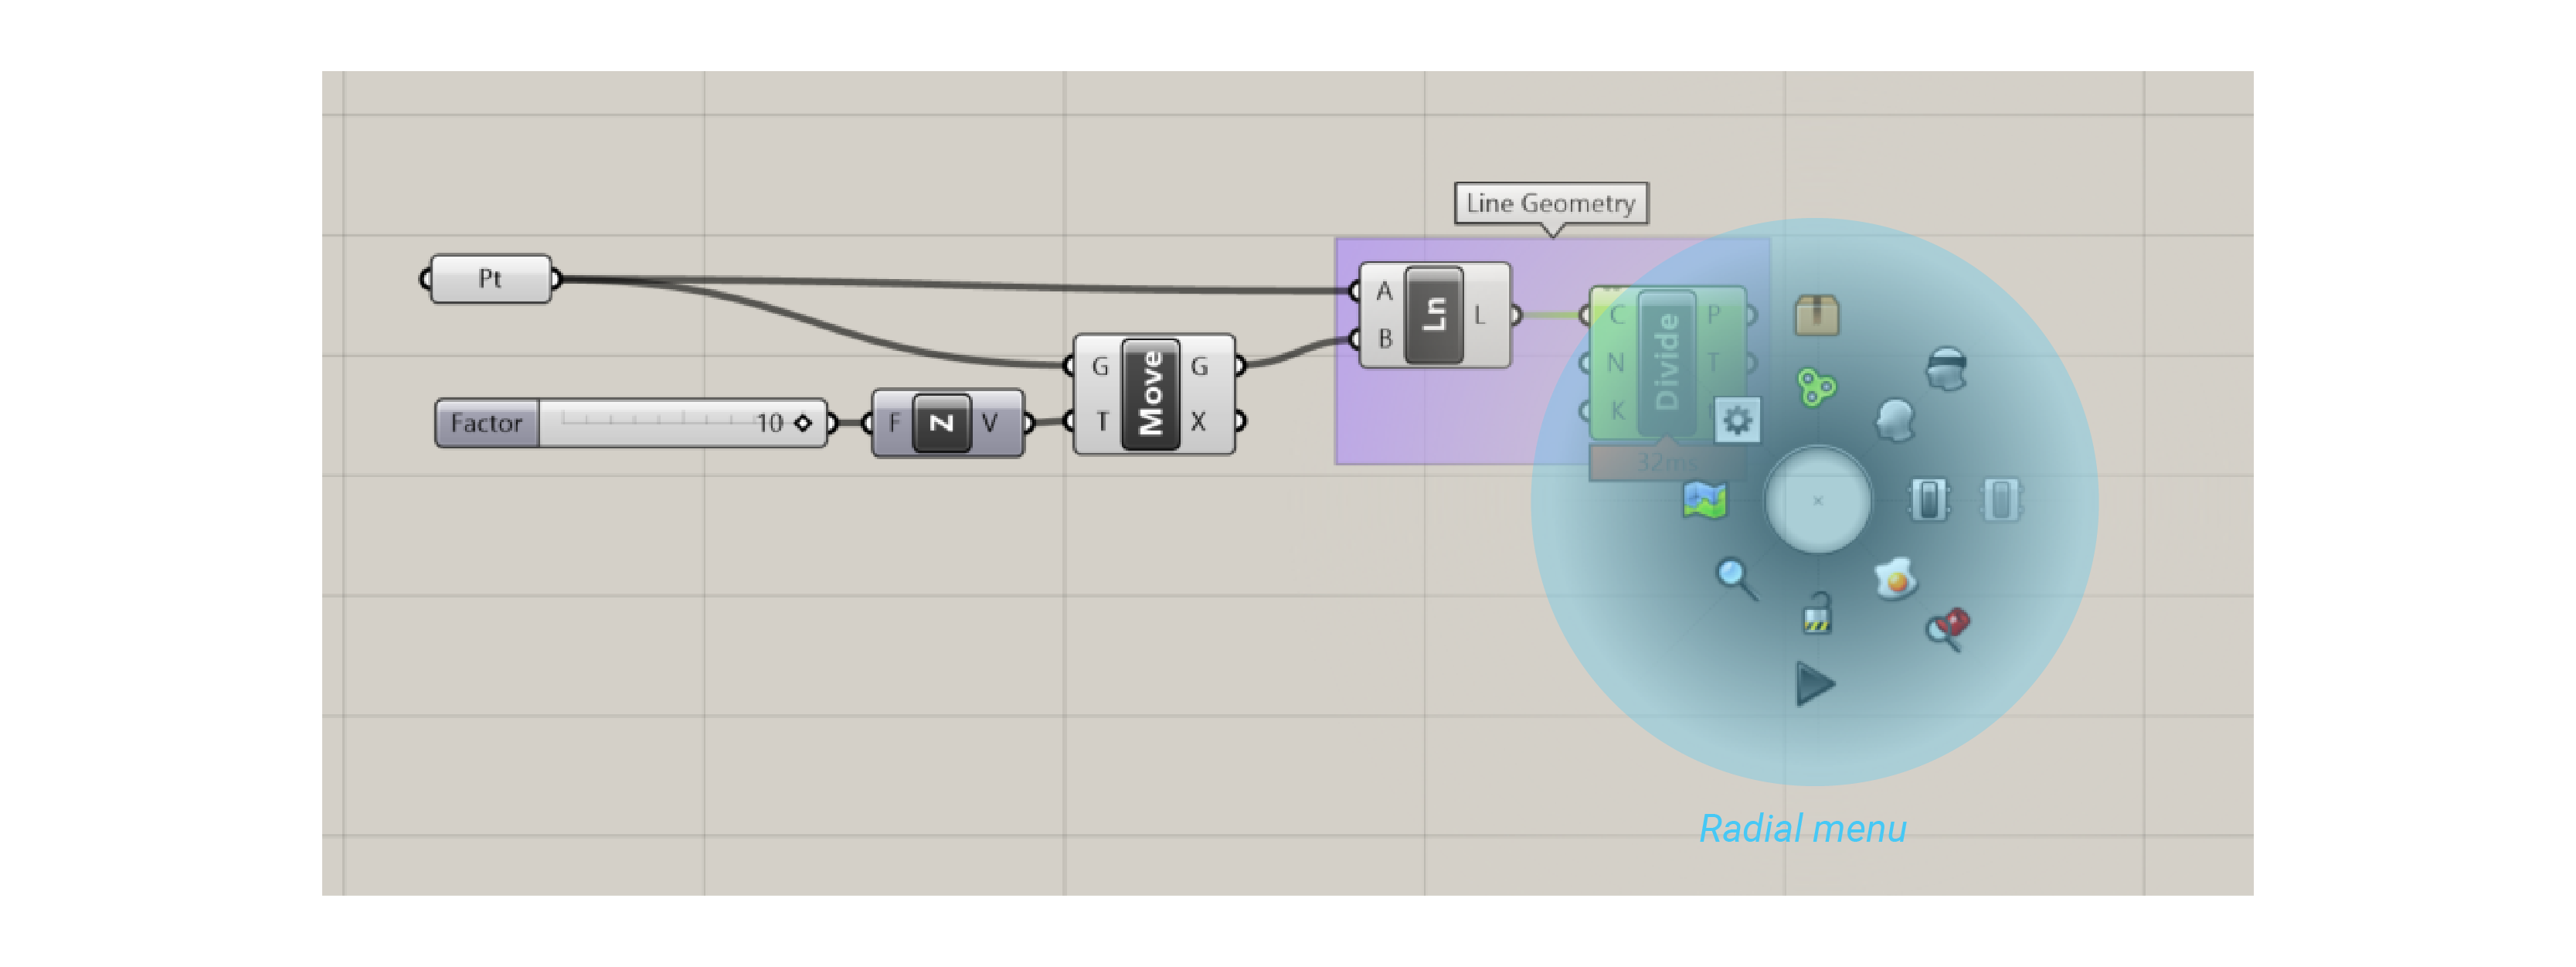
Radial Menu
You can find this feature by hitting the space bar (when your mouse is over the canvas or a component) or by clicking your middle mouse button.
It has has more features when selecting a component versus just clicking anywhere else on the canvas.
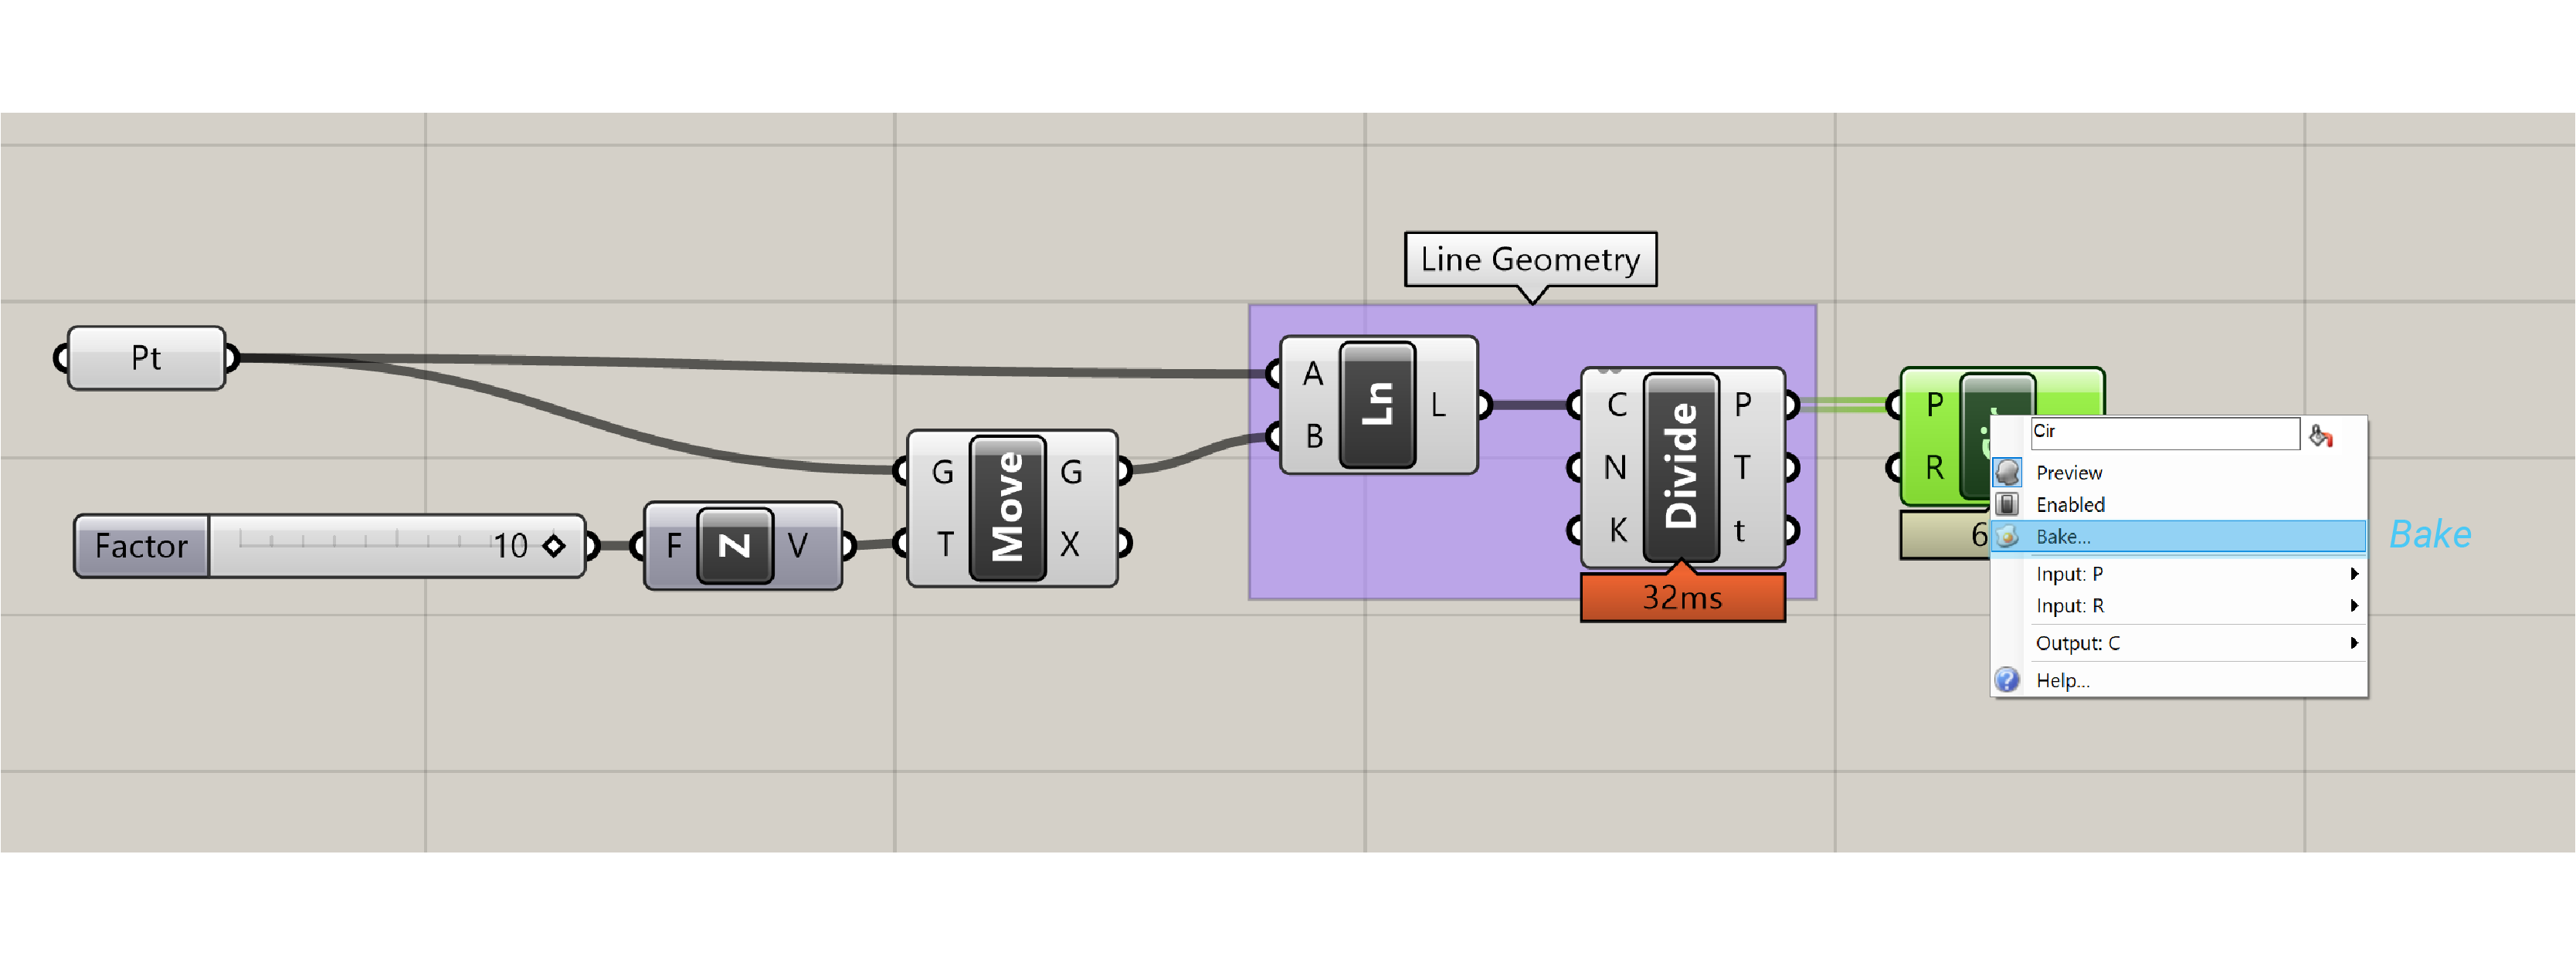
Baking Geometry
In order to select, edit, transform, etc… geometry in Rhino, you must Bake.
Once baked, it will no longer be responsive to the changes in your definition but in Rhino.
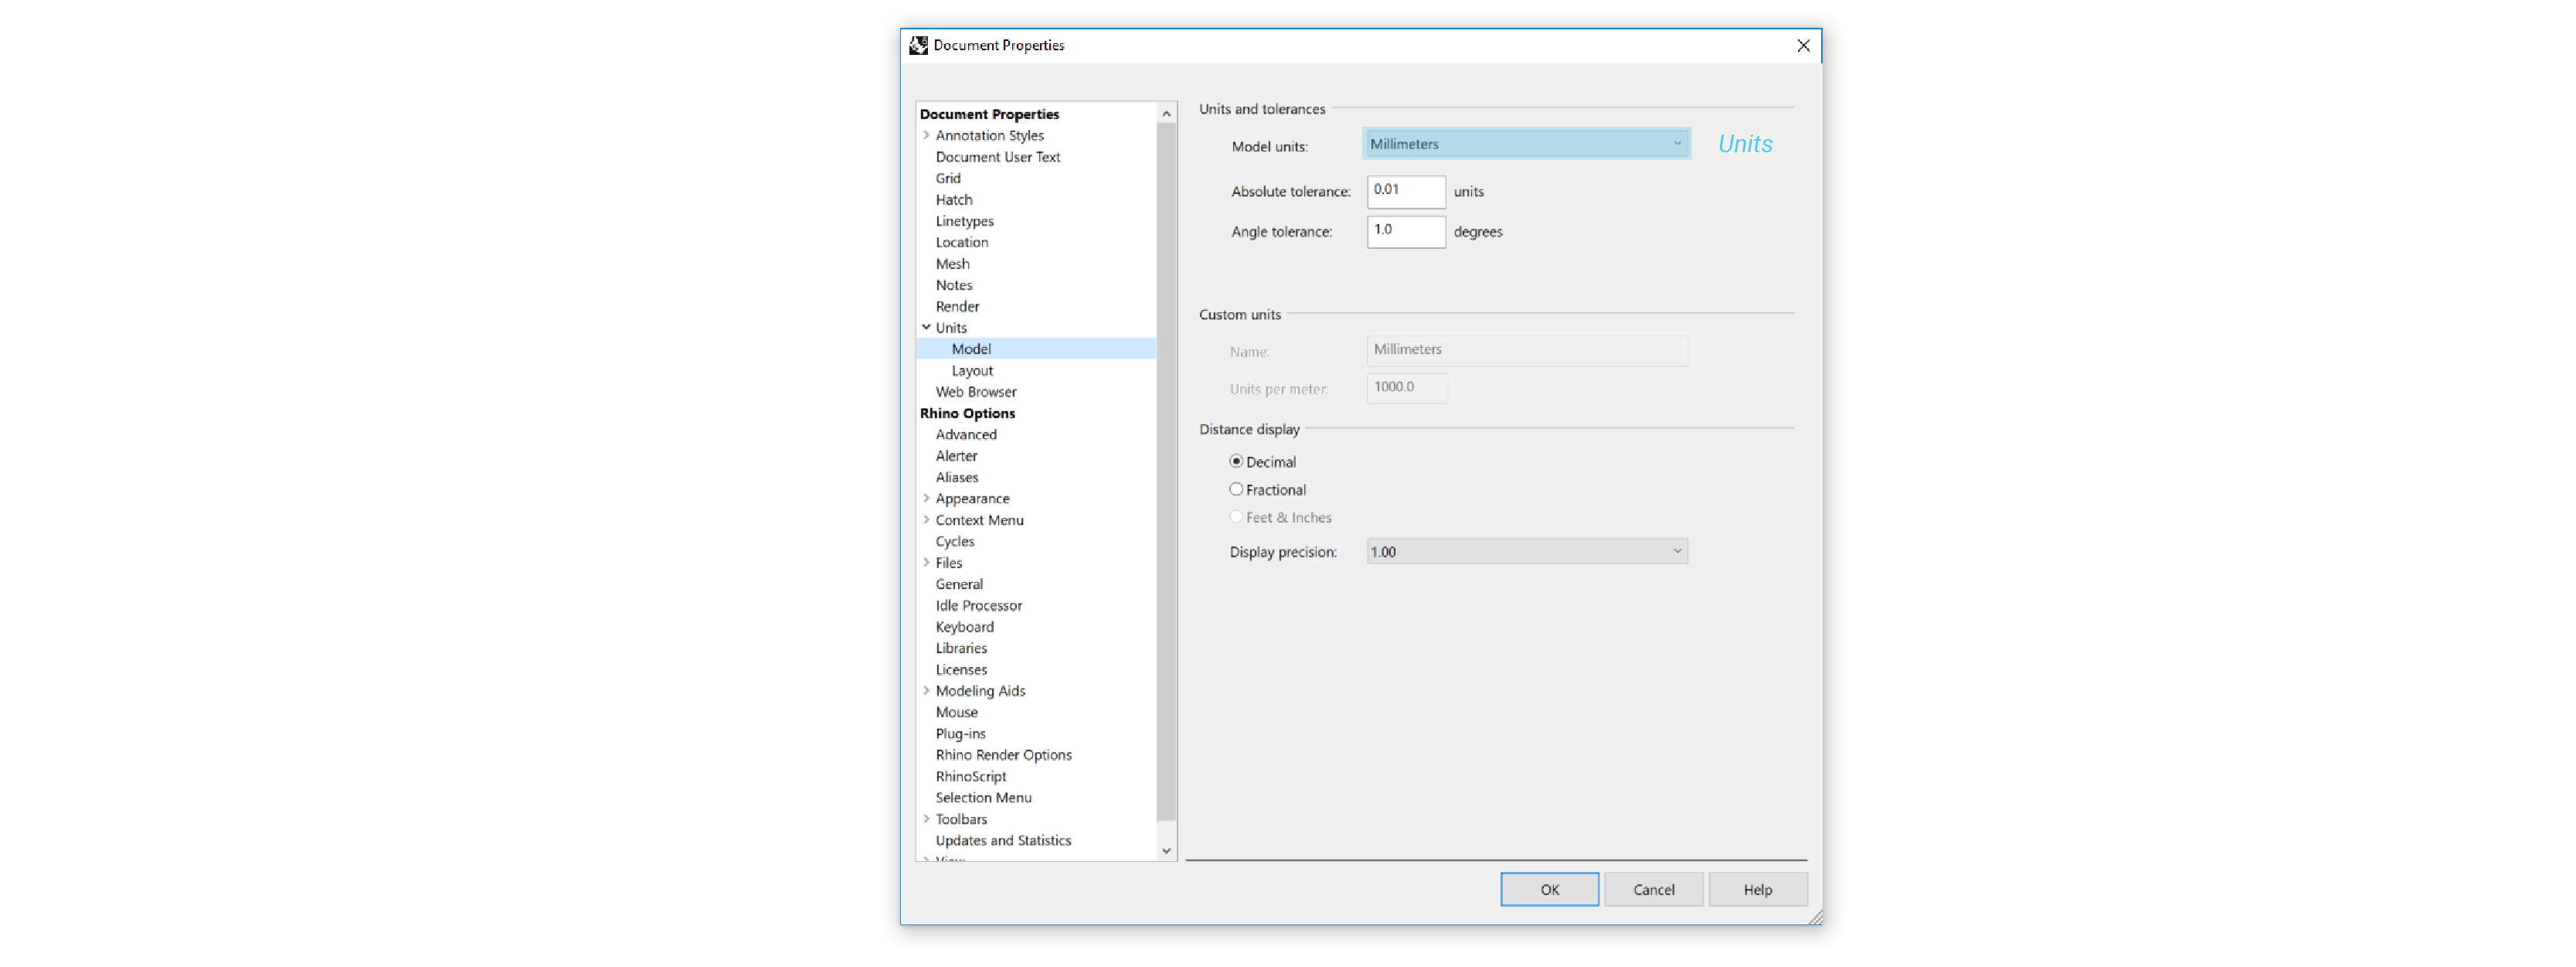
Units
Grasshopper inherits units and tolerances from Rhino.
To change the units, type Document Properties in the Rhino command line to access the menu.
Components
Grasshopper allows you to create visual programming called definitions. These definitions are nodes connected by wires.
Each component execute an specific action based on their inputs. There are manytypes of components for each different task.
Program flow

Parameters
Parameters store the data that we send in our definitions.
Parameters are small rectangular boxes with a single input and single output.
All parameter have a hexagonal border around their icon.
They can be found under Params > Geometry and Params > Primitive.

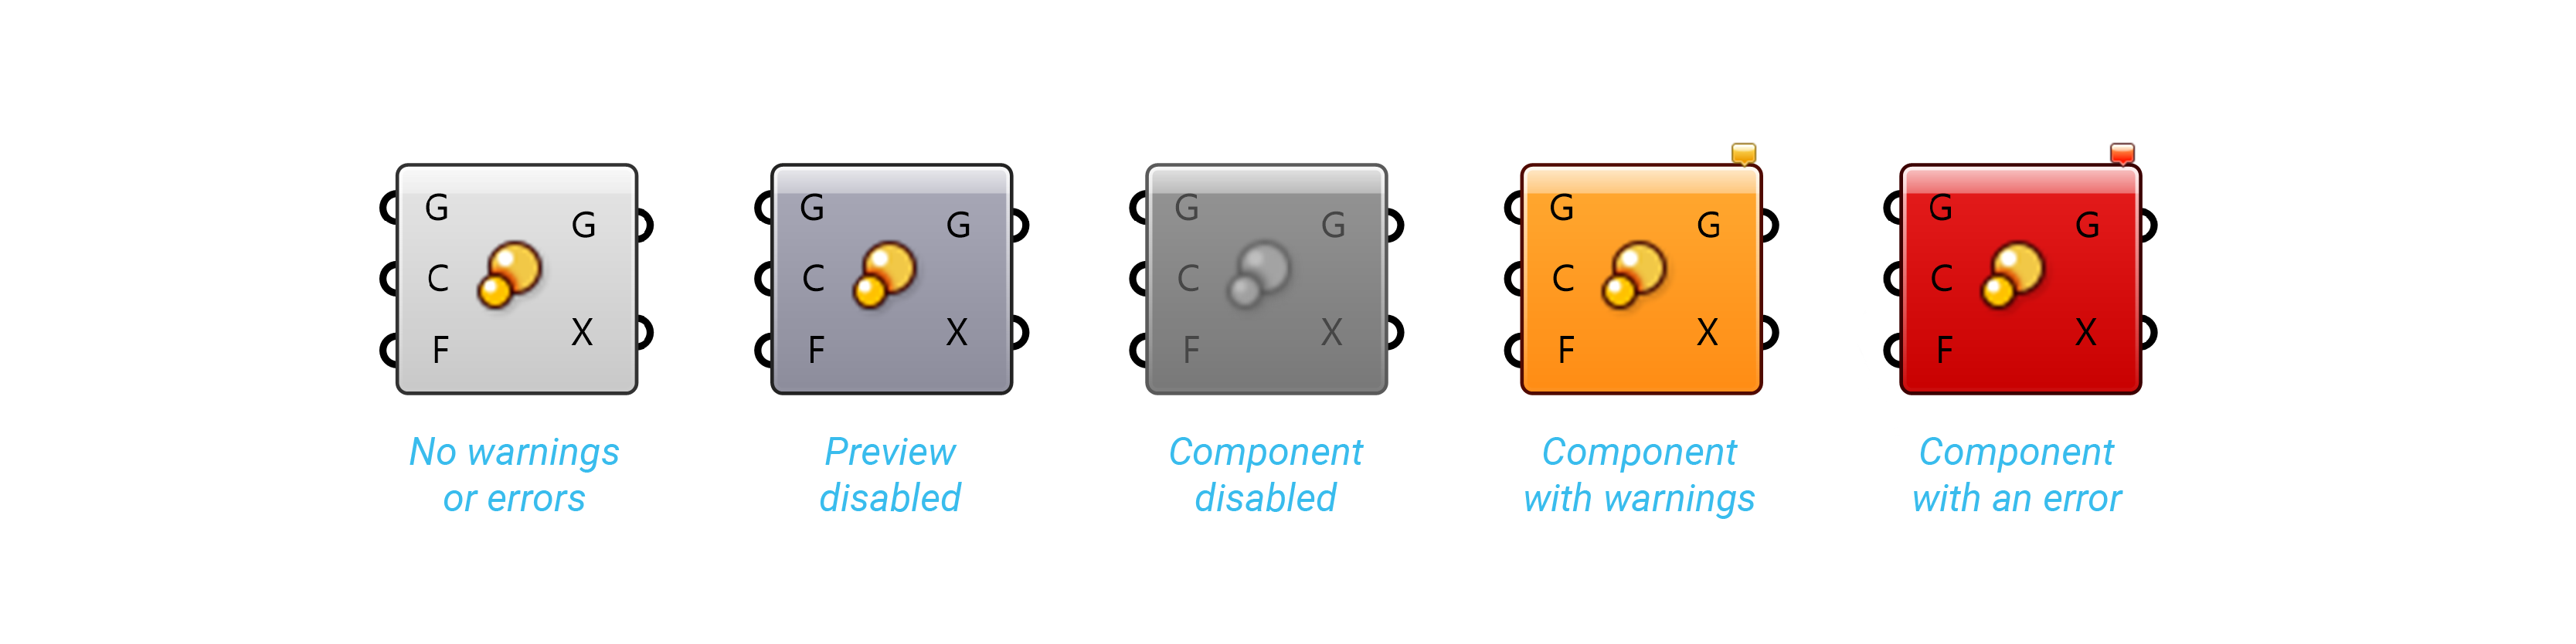
Component Colours
We can read some information about the state of each component based on their colour.

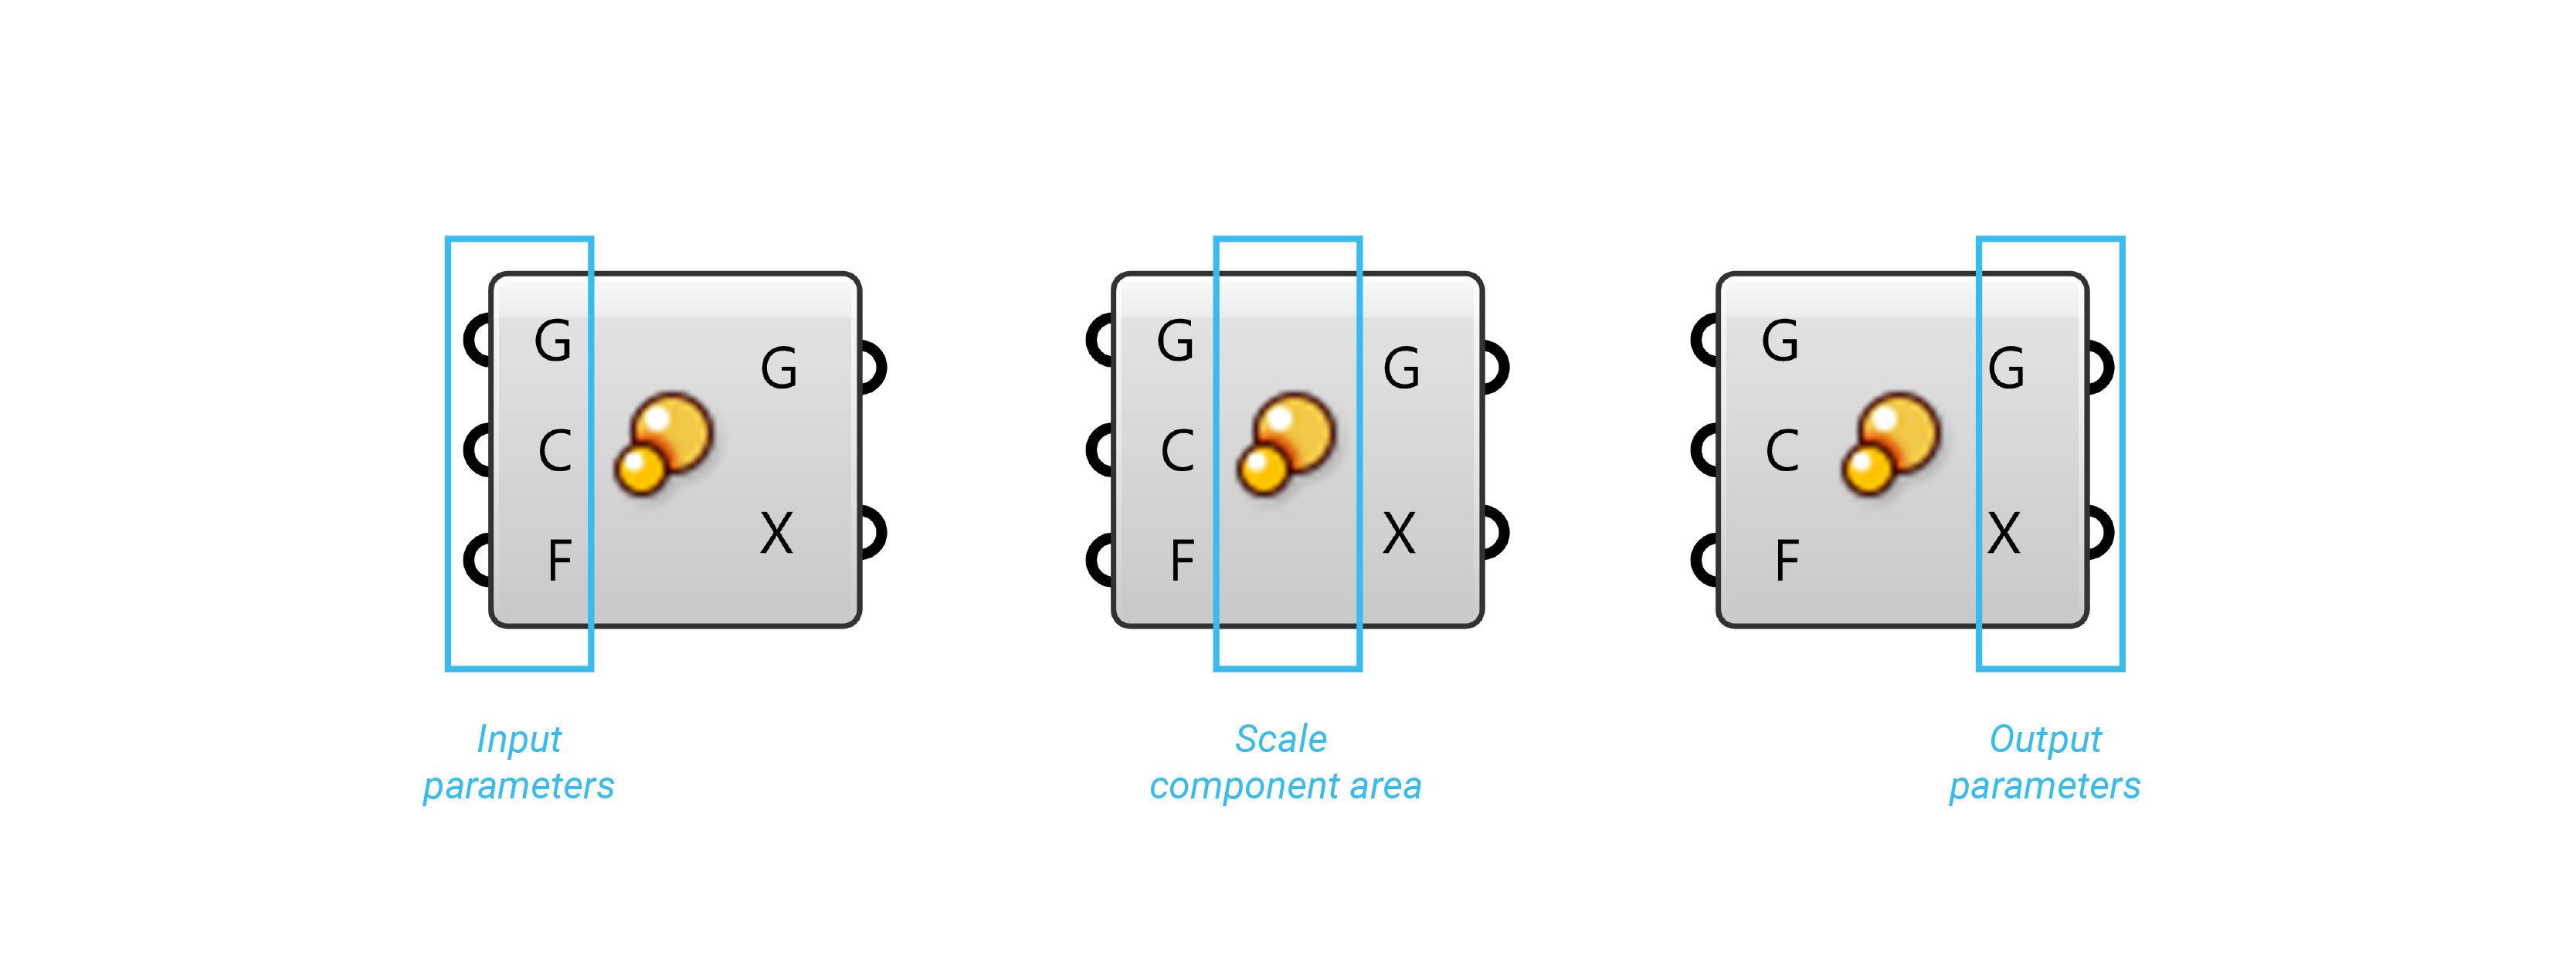
Component Parts
Components have Inputs and Outputs. It requires data in order to perform its actions.
Input parameter
The number slider is the most widely used Input Parameter. It allows to output a numeric value by interacting with the mouse.
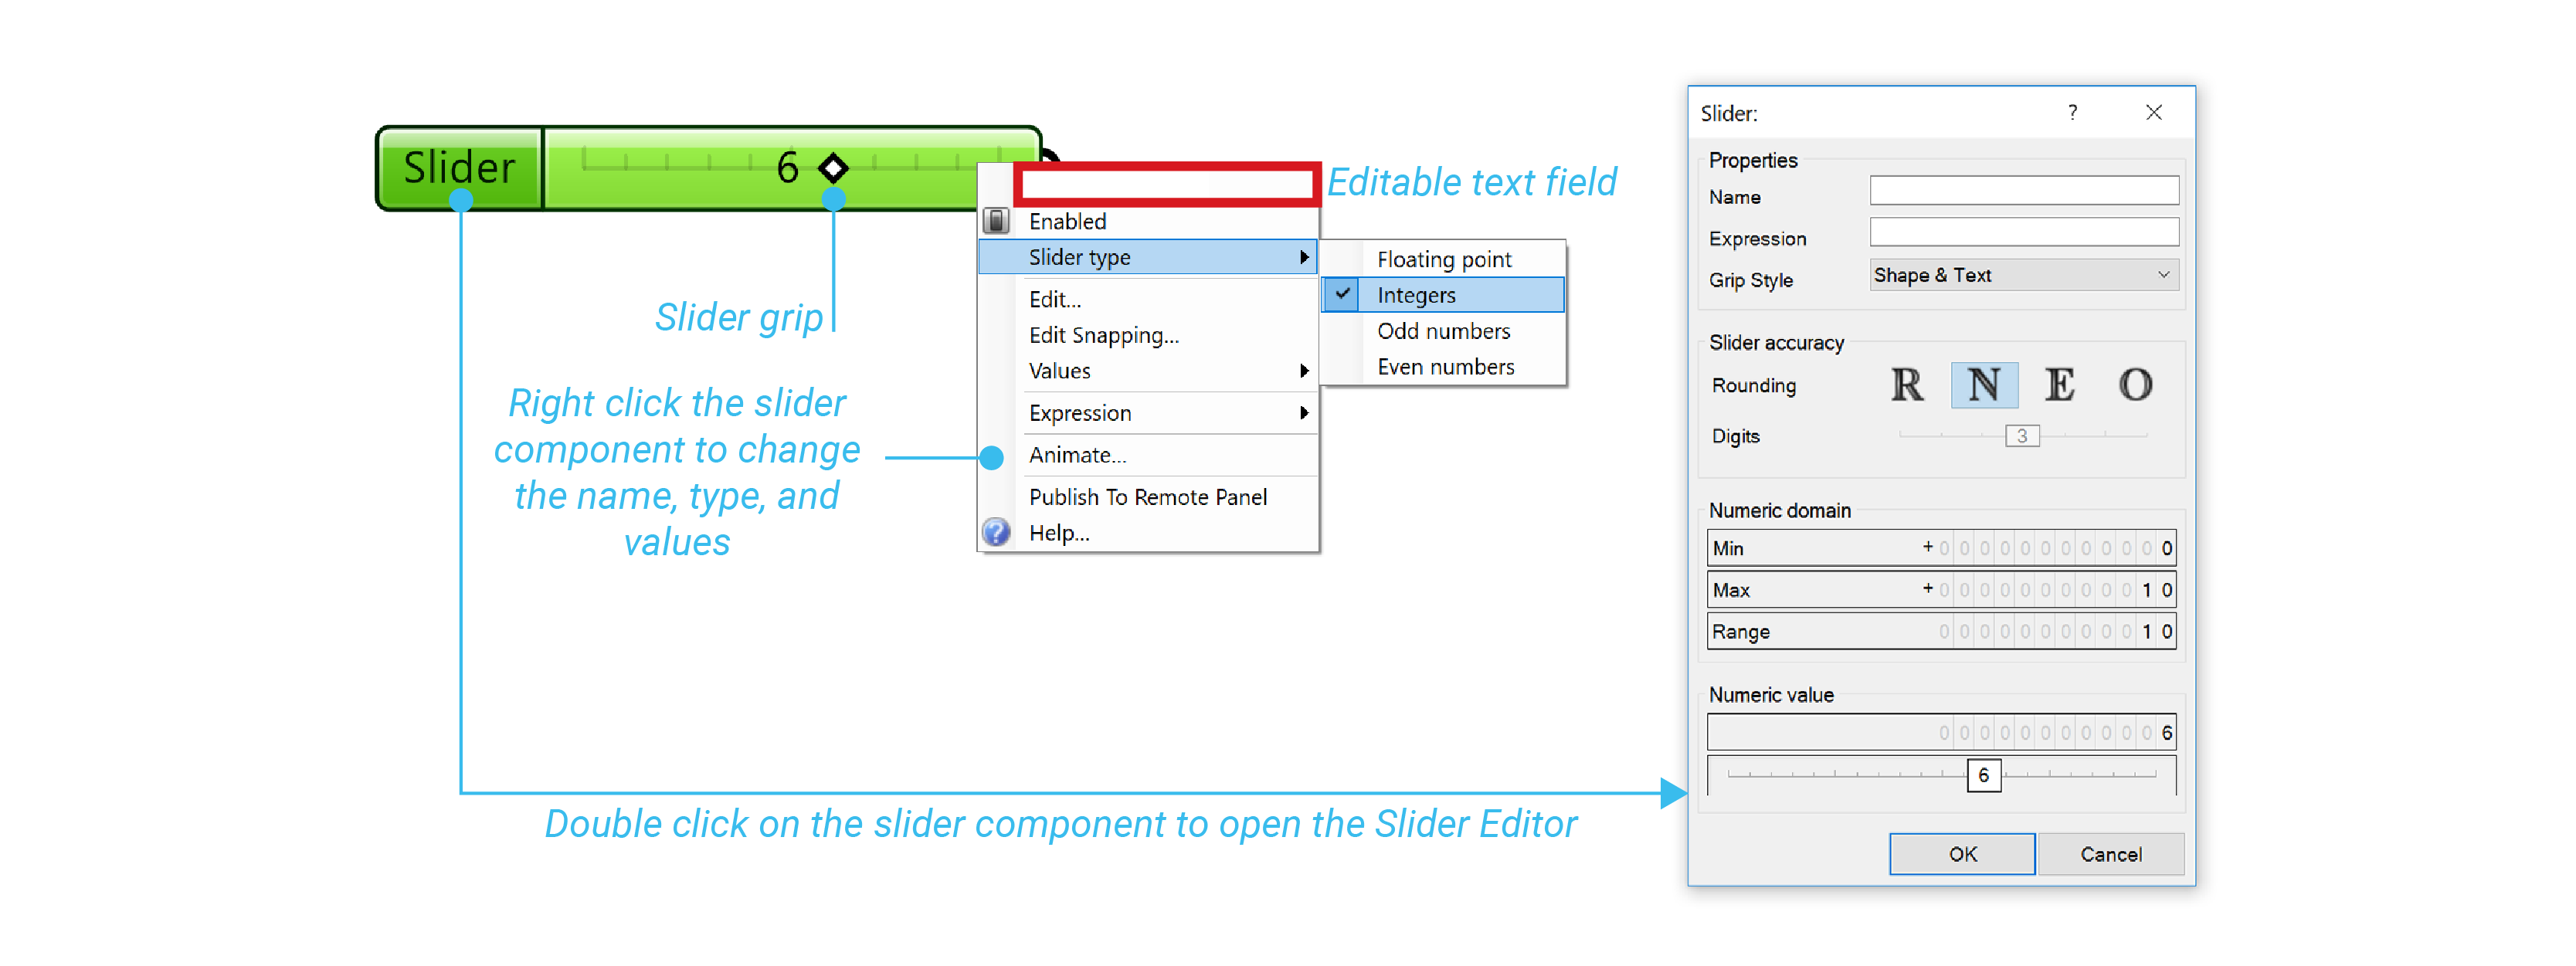
Wiring
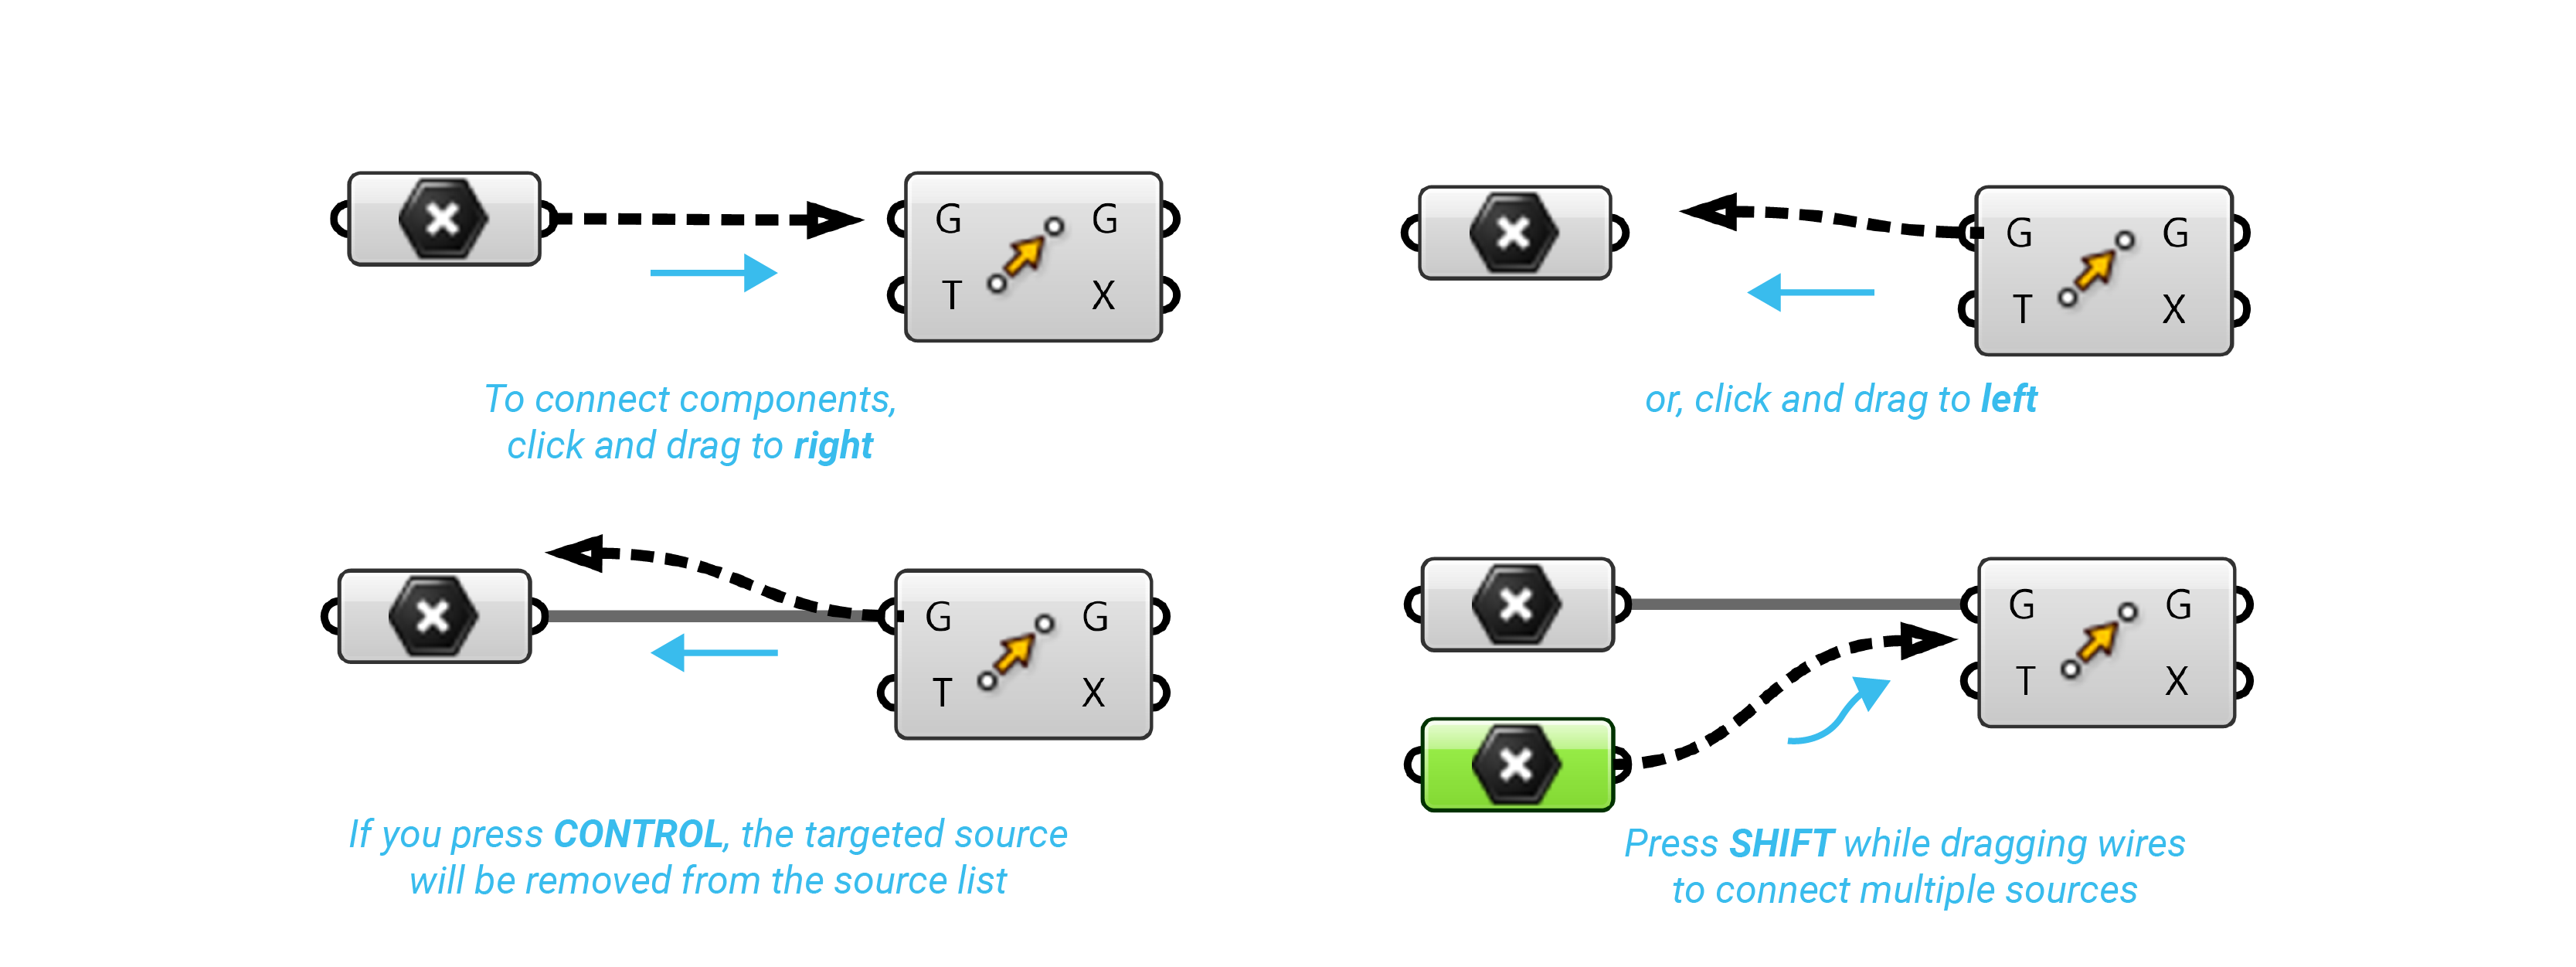
To connect components, click and drag near the circle on the output side of a component. The connection turn permanent when you release the mouse button.
It is possible to make the connections in both directions, from “Left to Right” or “Right to Left”.
Fancy wires
Grasshopper can give us visual information of what is flowing through the wires.
You have to enable it on Display > Draw Fancy Wires.
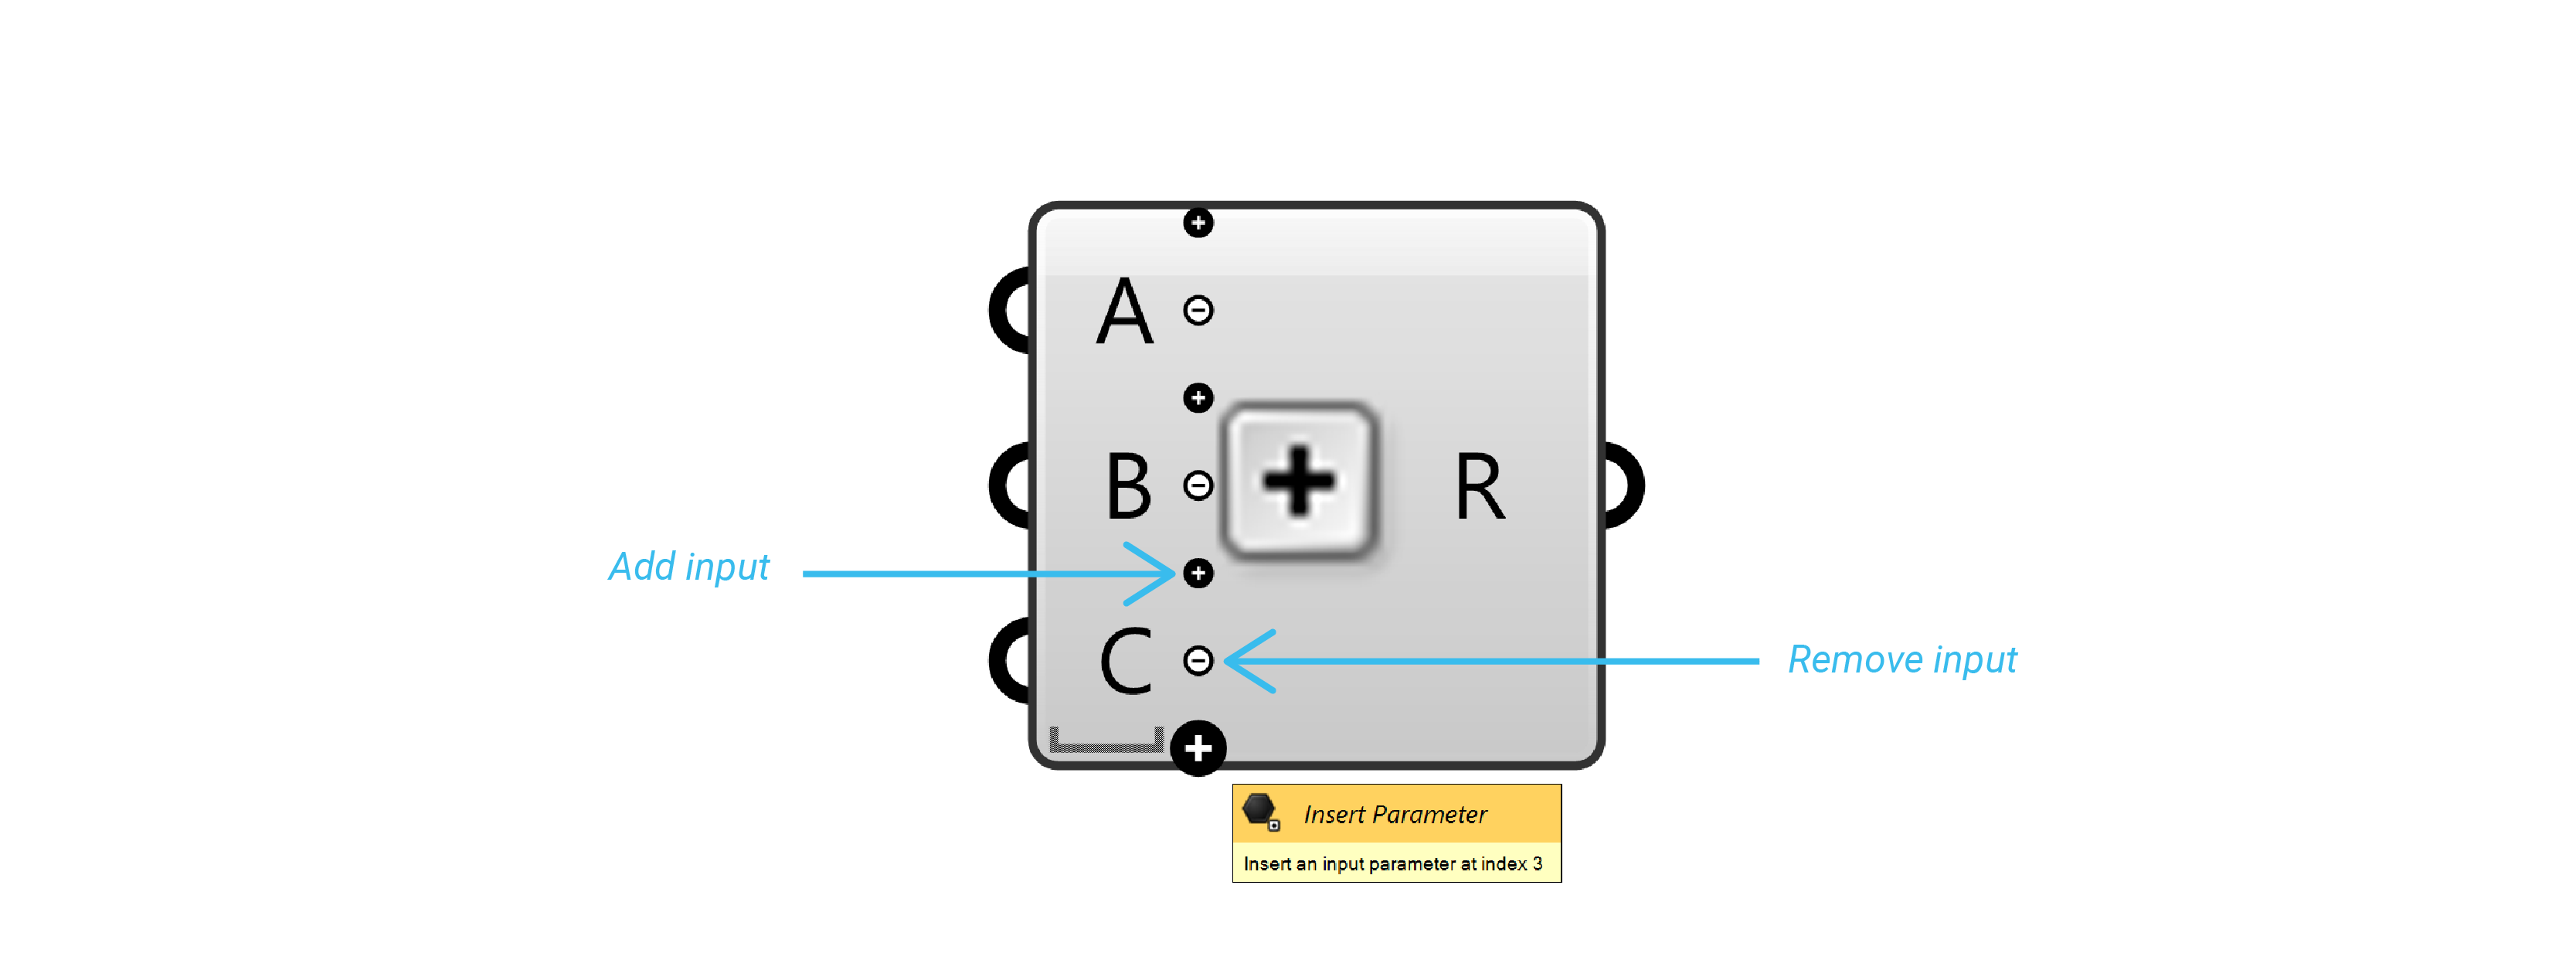
Zoom (ZUI)
Some components can be modified to increase the number of inputs or outputs through the Zoomable User Interface (ZUI).
By zooming in on the component, an extra set of options will appear.
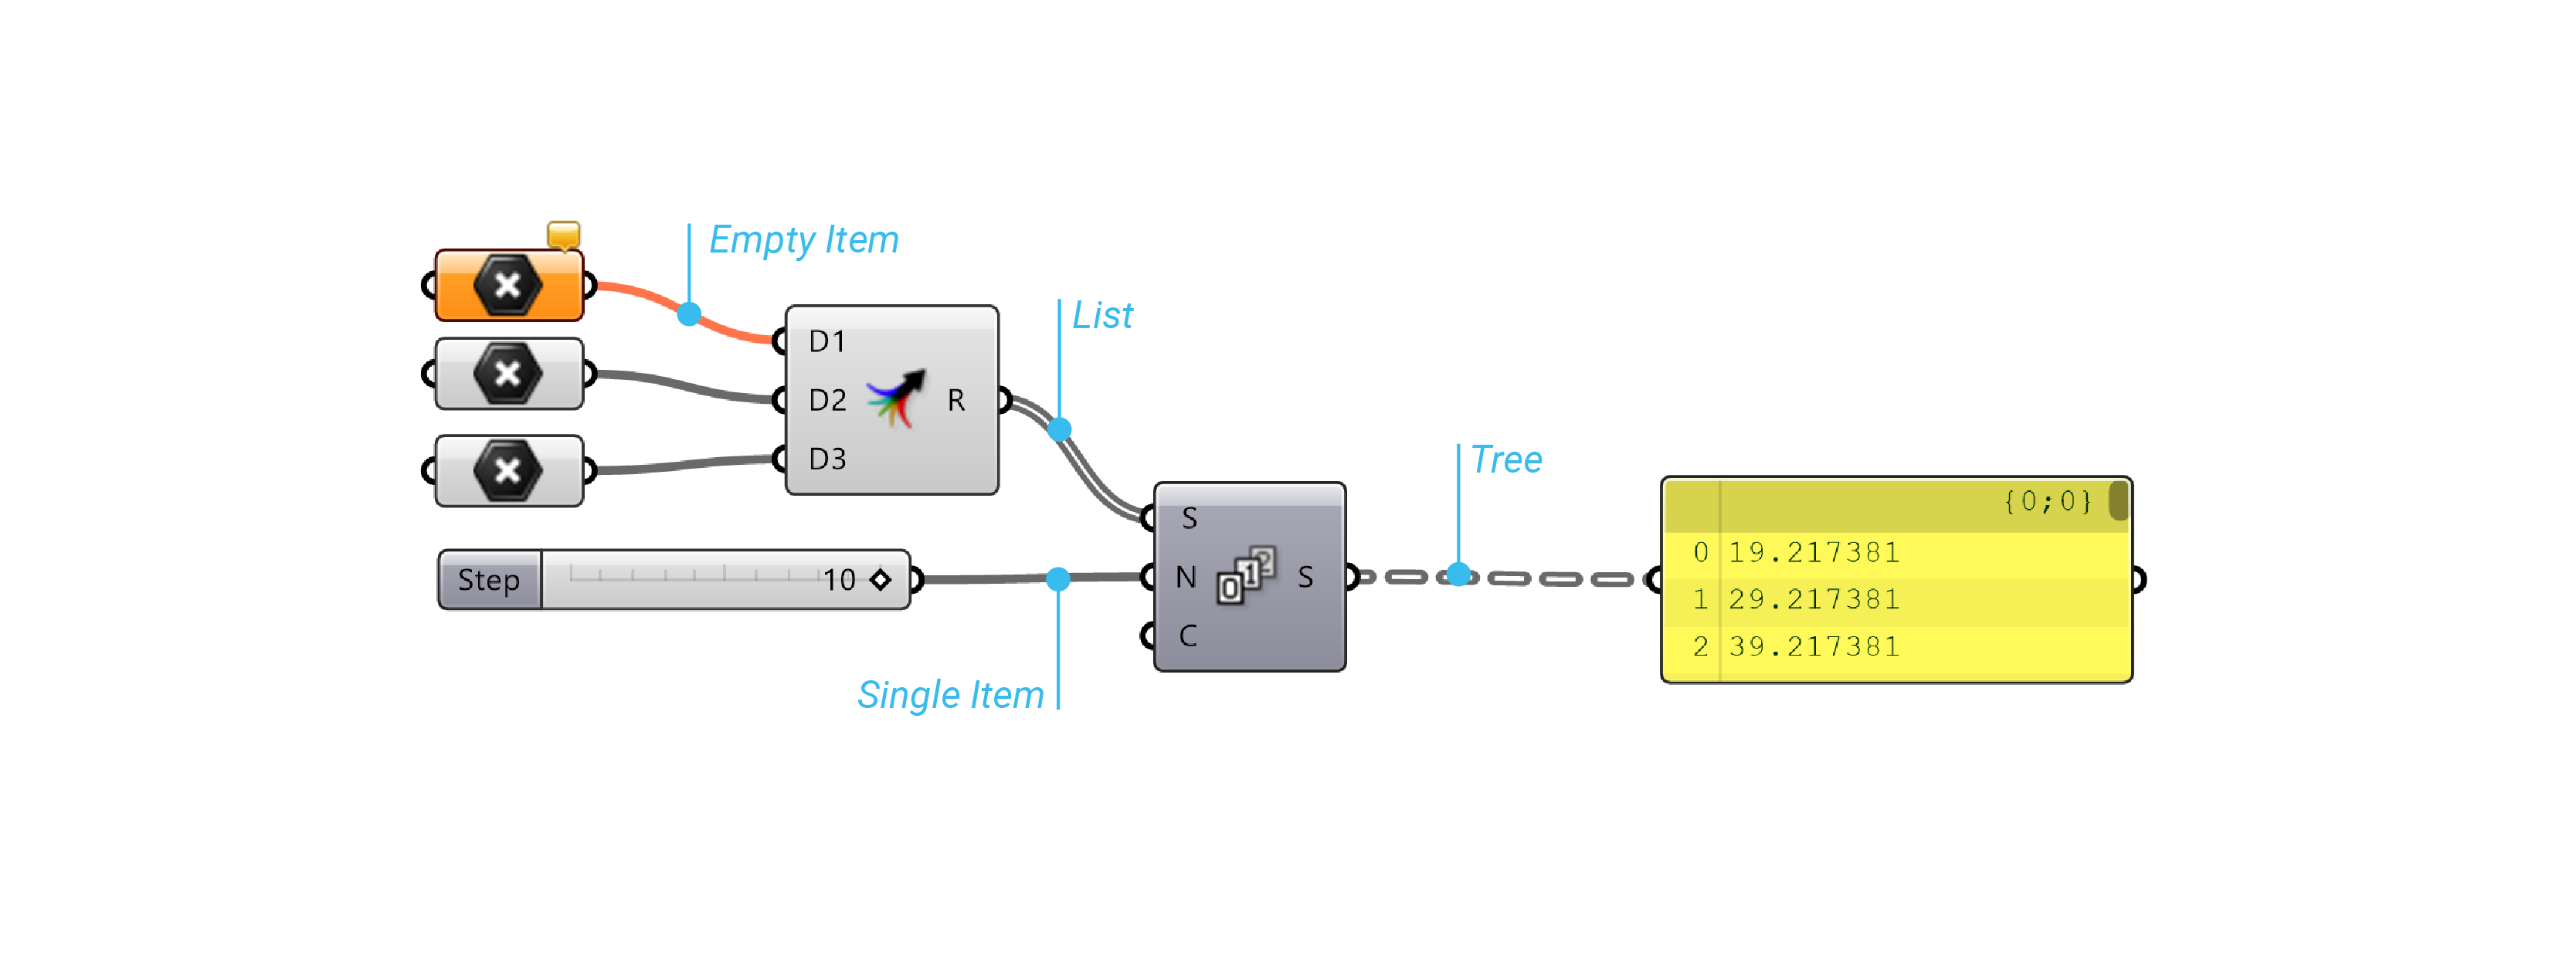
Data Storage
Most of the components can store two different kinds of data:
Volatile: is data inherited from one or more sources and is modified whenever a new solution starts. It will disappear if you do not internalize it.
Persistent: is data which has been specifically set by the user. It will remain and will not change.
Internalise Data
It is possible to Internalise Data directly in a component. The data will then change from volatile to persistent, and wont be updated.
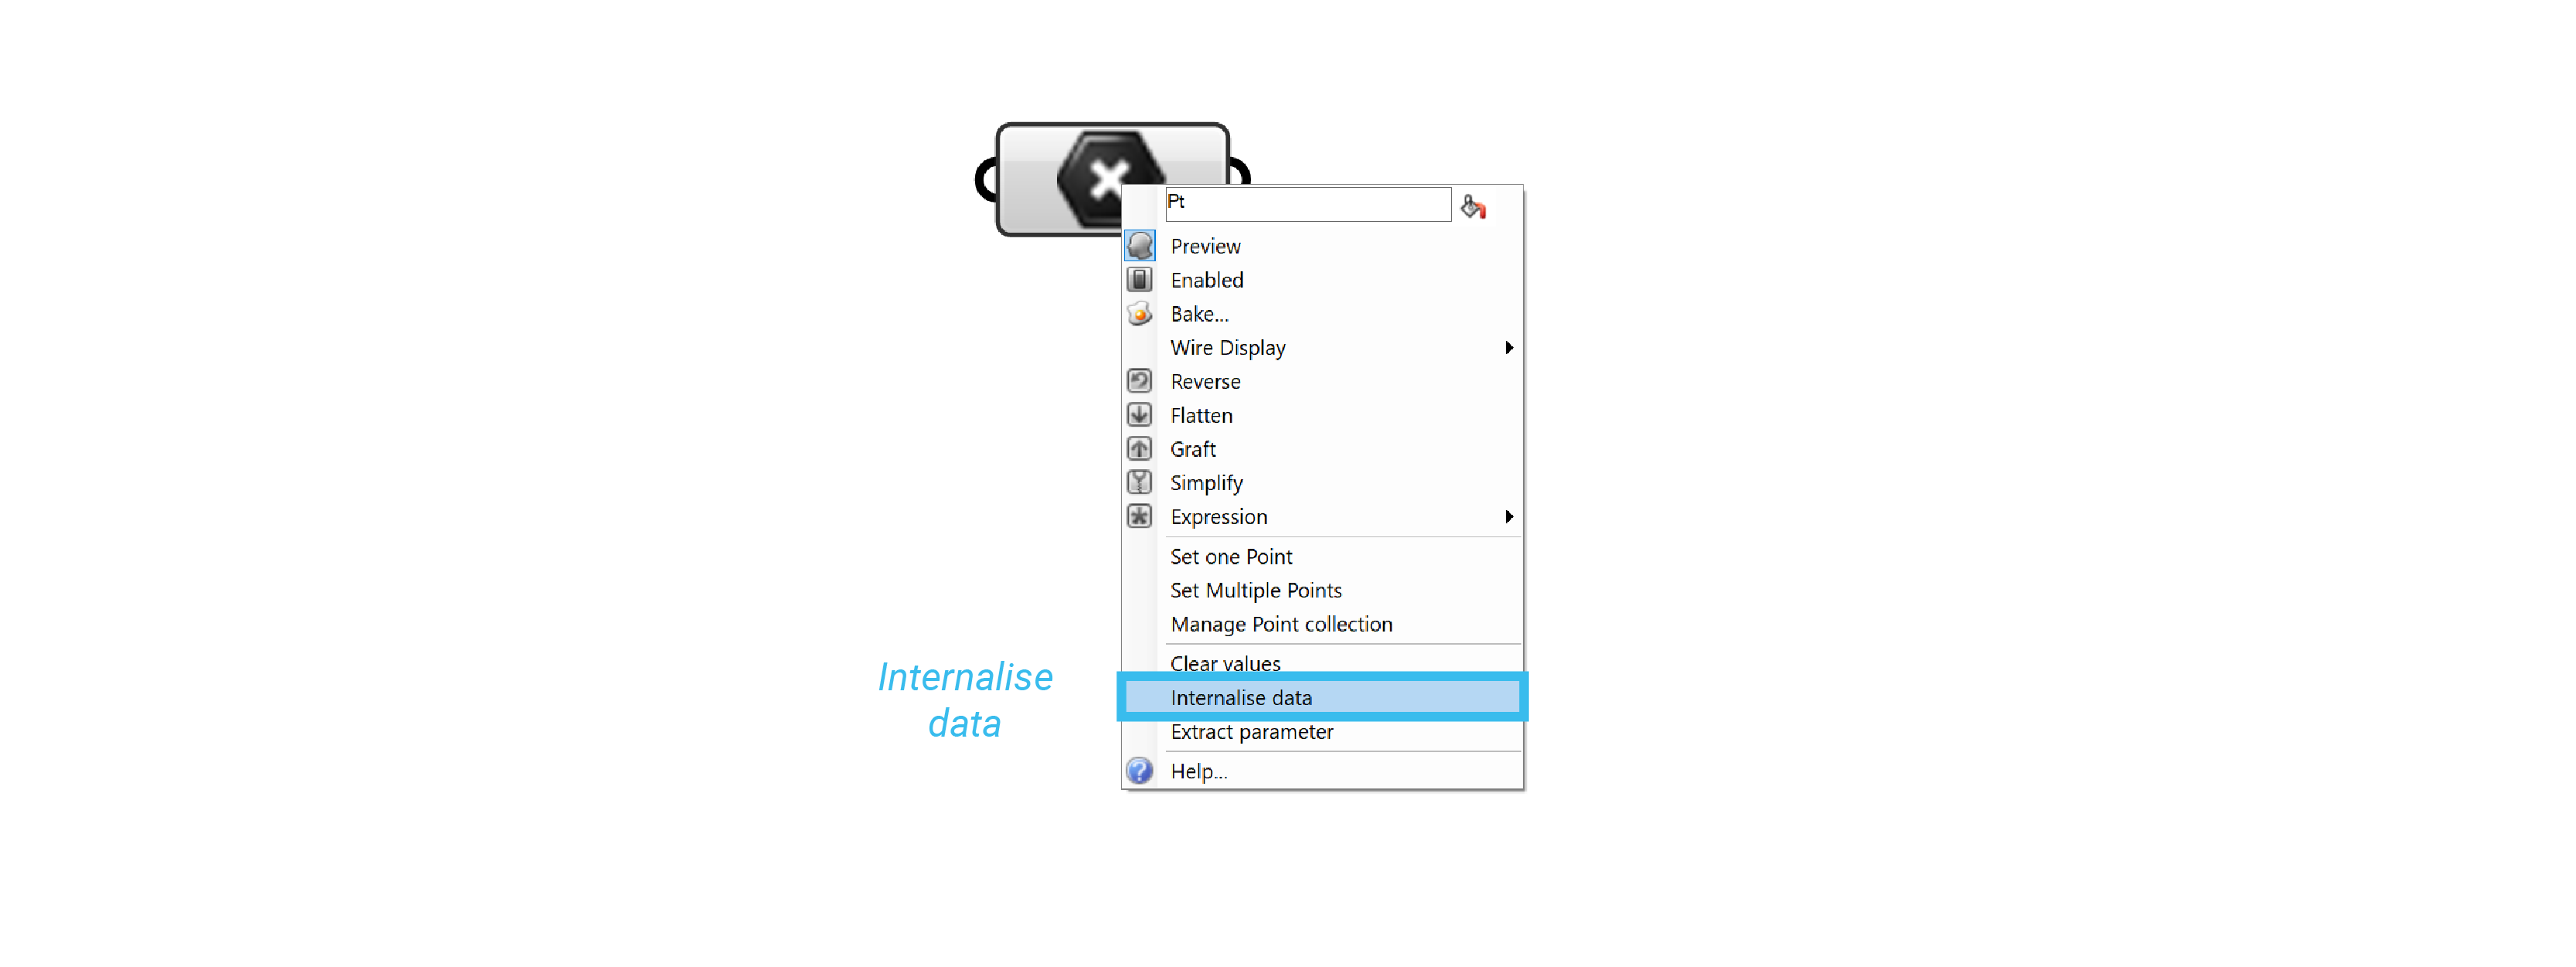
You can store data in a Grasshopper component:
- Internally
- Externally
- Referenced
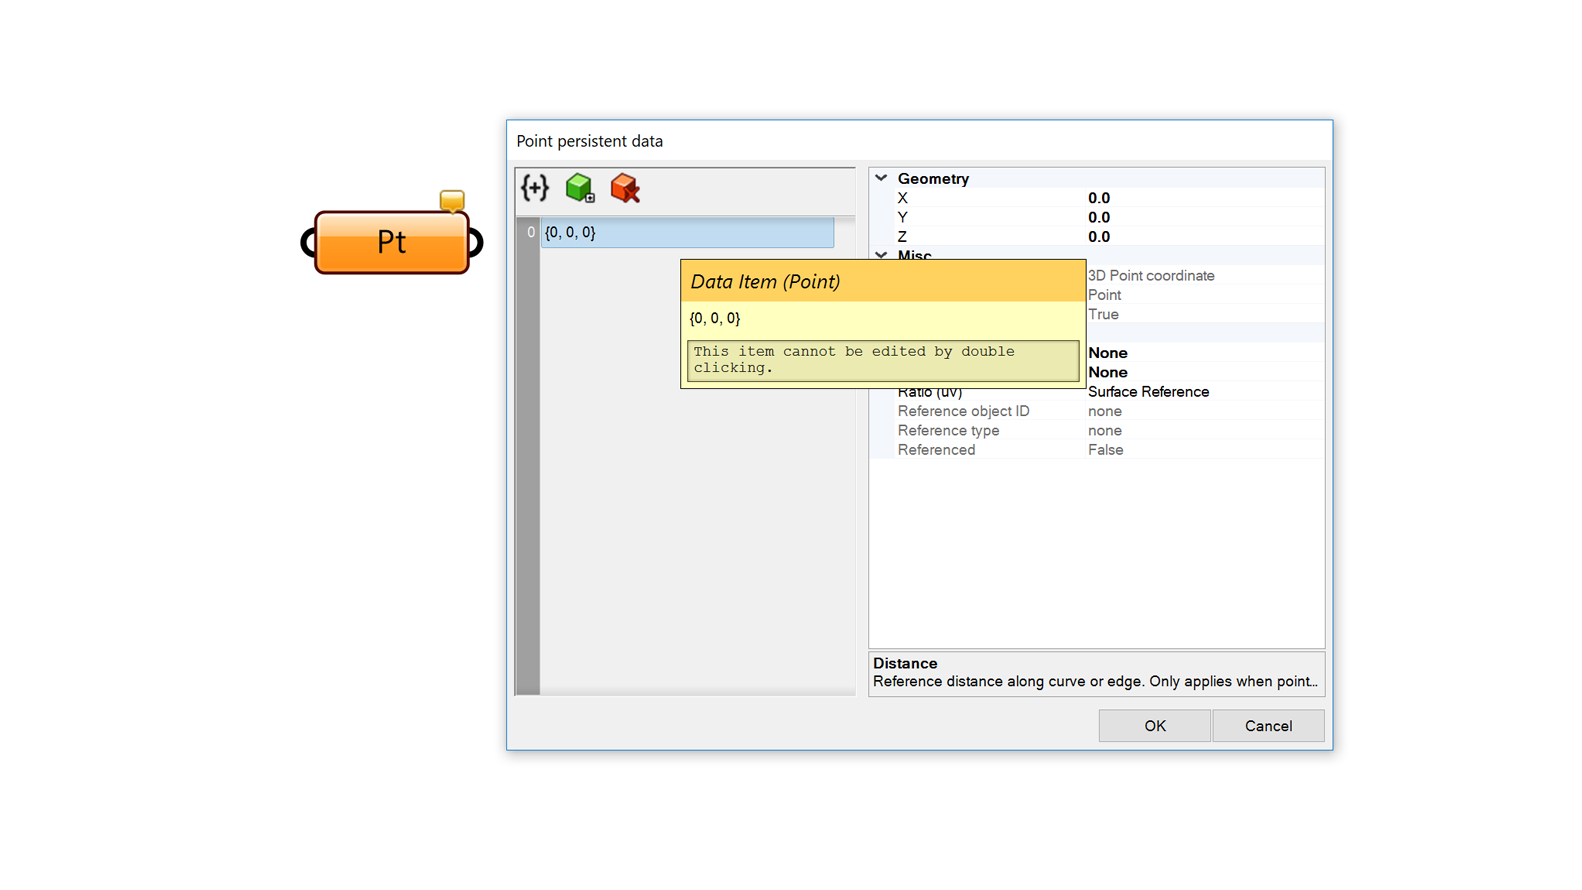
Internal
Data lives inside the component.
Right mouse click on Component > Manage Collection.
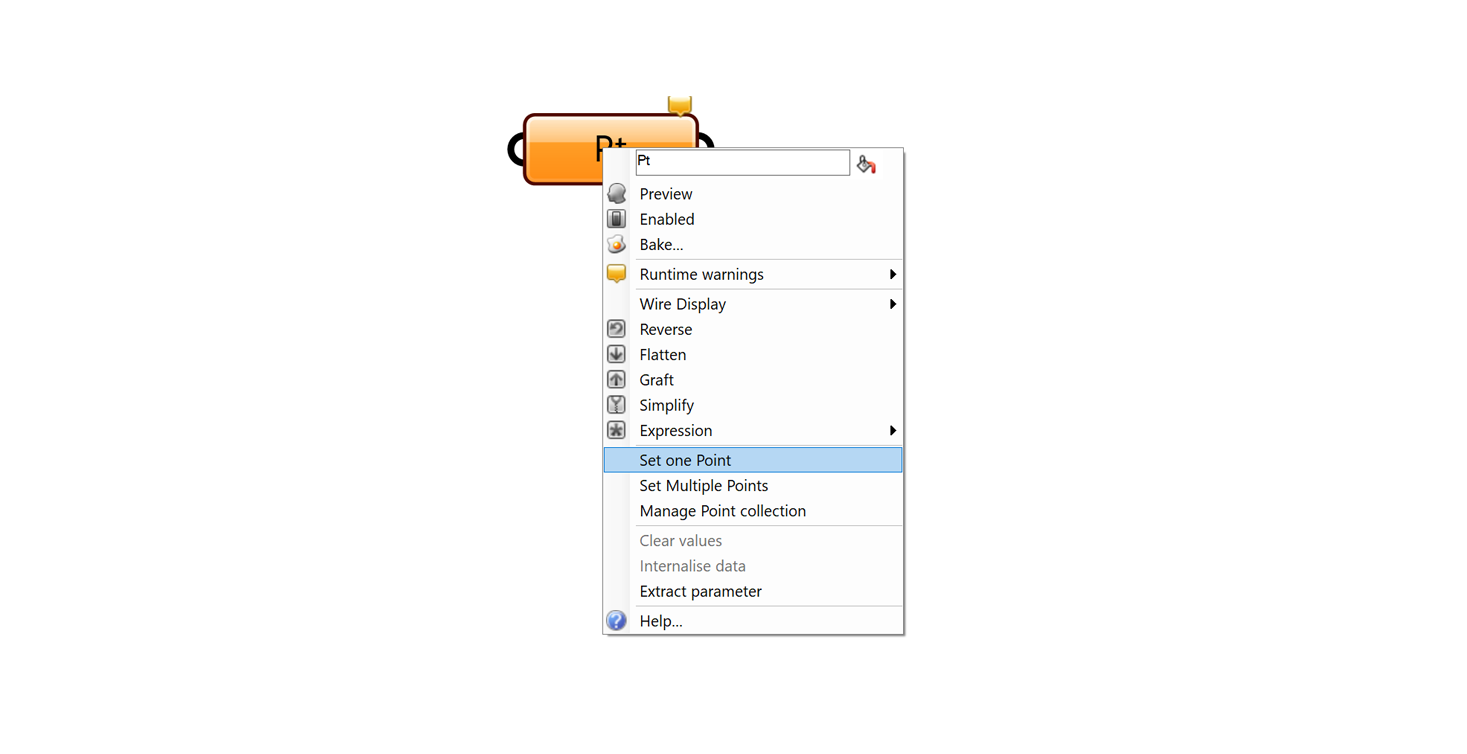
Referenced
It allows you to reference Data directly from Rhino viewport.
Right mouse click on the component > Set one point (or multiple points).
At this moment the window of Grasshopper will disapear allowing you to reference the geometry from Rhino viewport.
External
Input data given as a list of numbers.

or referenced to an specific location in your computer:
